I'd like to thank everyone who has read the blog over the past few months, I hope it's been useful.
Despite clocking up over 2000 views since I began posting in march, I've decided to join forces with a few people and start posting over on AirsoftOperator.com, as I'd rather do this as part of a team.
I'll leave these reviews here for people to read, but from now on I'll just be posting on AO.
Thanks for reading once again!
Dave Out
Wednesday, July 24, 2013
Saturday, July 20, 2013
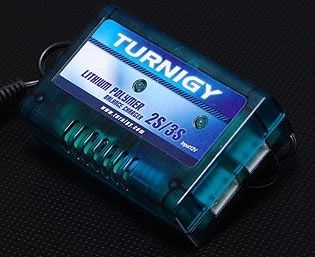
Charging Lipo Batteries - The Bad & The Ugly
Evening guys,
Just a quick post on charging Lipo Batteries, as I've been somewhat stung.

For the last 18 months I have told people to get one of these chargers. After all, they worked for me didn't they? Why bother getting an expensive one? Well it started reporting a problem with one of my batteries today, so I broke out the multi-meter to give the cell voltages a measure.
Both of these batteries are 7.4V 1450mAh 20C lipos.
Battery one (still works like a beast in my guns):
Total = 10.46V, C1 = 5.46V, C2 = 5.00V
Battery two (dead, completely dead - partially my fault for not charging it whilst it was empty for a long time):
Total = 6.93V, C1 = 1.35V, C2 = 5.58V
So in other words, the reason my batteries seem to be wearing down so quick is that this charger is, quite frankly, shit. It's overcharging my batteries quite disastrously. It would also explain why when I bought my second battery it seemed (despite being identical) to provide a higher rate of fire than my new one - simply because it hadn't been worn down so much it couldn't sustain a high current output.
So that's me back to the drawing board for a charger and batteries. I guess now would be a good time to jump to Li-Fe if I fancied it. Either way, I've still got my glock to plink with!
Dave Out
Just a quick post on charging Lipo Batteries, as I've been somewhat stung.
For the last 18 months I have told people to get one of these chargers. After all, they worked for me didn't they? Why bother getting an expensive one? Well it started reporting a problem with one of my batteries today, so I broke out the multi-meter to give the cell voltages a measure.
Both of these batteries are 7.4V 1450mAh 20C lipos.
Battery one (still works like a beast in my guns):
Total = 10.46V, C1 = 5.46V, C2 = 5.00V
Battery two (dead, completely dead - partially my fault for not charging it whilst it was empty for a long time):
Total = 6.93V, C1 = 1.35V, C2 = 5.58V
So in other words, the reason my batteries seem to be wearing down so quick is that this charger is, quite frankly, shit. It's overcharging my batteries quite disastrously. It would also explain why when I bought my second battery it seemed (despite being identical) to provide a higher rate of fire than my new one - simply because it hadn't been worn down so much it couldn't sustain a high current output.
So that's me back to the drawing board for a charger and batteries. I guess now would be a good time to jump to Li-Fe if I fancied it. Either way, I've still got my glock to plink with!
Dave Out
Sunday, June 23, 2013
Weapon Light Shootout
First of guys, I've set up a twitter page for the blog - if you want to
follow what I'm posting without having a blogger account then this is the best
way! www.twitter.com/LoB_airsoft
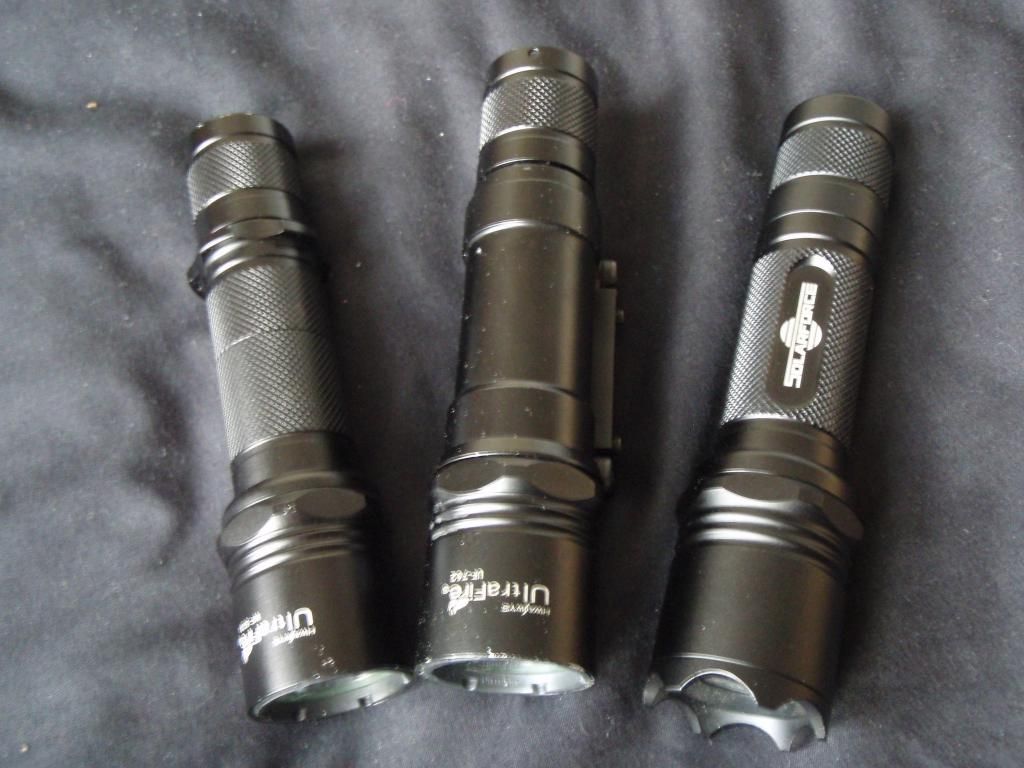 |
| L-R: WF-503a, UF-762, L2 |
Review Scores
Item name: Ultrafire UF-762 with Pressure Switch
Item type: Torch body
Cost: £22 including XML bulb
Overall rating: 3/5
Item name: Ultrafire WF-503a with Press Button
Item type: Torch body
Cost: £12 excluding bulb
Overall rating: 3/5
Item name: Solarforce L2
Item type: Torch body
Cost: £17 excluding bulb new
Overall rating: 4/5
Item Name: Ultrafire Cree XM-L T6 P60 Drop-in (single
mode)
Item type: Torch bulb
Cost: came with UF-762
Overall Rating: 4/5
Item Name: Ultrafire Cree XR-E Q5 P60 Drop-in (single
mode)
Item type: Torch Bulb
Cost: came with L2 second hand
Overall Rating: 5/5
Introduction
Sorry to begin a post with that horrendous list of items
and review scores, but I like to put the summary at the top of the posts. Anyway,
on to the interesting bits now.
For years I thought my Maglite Mini was a great torch -
it was bright, well made and looked the part. Then I got into airsoft and
started looking for a weapons torch for my rifle in preparation for a weekender
back at easter. I initially settled on the Ultrafire UF-762 as it was cheap,
had a built in rail mount and came with a pressure pad. Ideal.
Shortly after getting this torch and discovering how
monstrously bright it was I purchased an Ultrafire WF-503a, intending to mount
it on my bike and transfer the bulb from the 762 over to it. This I did, and
was pleasantly surprised at the quality of the torch. Around this time I
started to have issues with the pressure pad on the 762 and so I started to
look for a better alternative, however I soon discovered that I really needed a
Solarforce L2 to have access to quality accessories. So I bought a second had
Solarforce L2, leading me to this review.
Before reviewing these torches in greater depth, I really
need to explain a little bit about the type of torch these are all based upon,
and what some of the numbers and letters that retailers like to put in the
names for these torches mean.
History
I am not sure how, but SureFire rose to prominence as a
US based maker of high performance torches and weapon lights, and one of their
most successful models was the SureFire 6P. Designed to take 3V CR123a lithium
batteries, the torch initially shipped with a xenon incandescent bulb, which
apparently wasn't that bright. The bulb unit that it took was called a 'P60
drop in', and shortly LED drop ins were available, increasing battery life and
lumen output far beyond the original design.
At some point a company called CREE rose to the position
of making the best high output LEDs on the market, and as SureFire began to
expand the range of 6P based torches, the imitations soon followed. First and
foremost amongst them is the Solarforce L2 - according to many users on
flashlight forums it is simply the best P60 host (body into which you place a
P60 drop in) that one can buy. Other off-spec imitations followed (they are
numerous), and the user can select from a wide range of P60 hosts, and a wide
range of P60 drop ins.
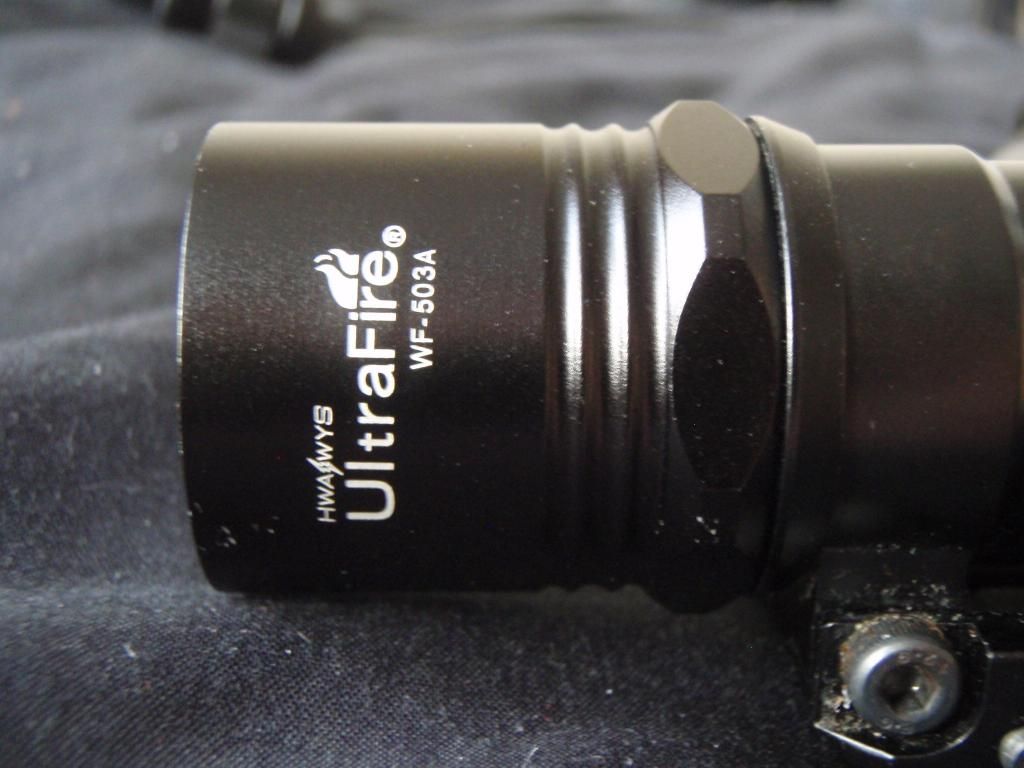
UltraFire WF-503a
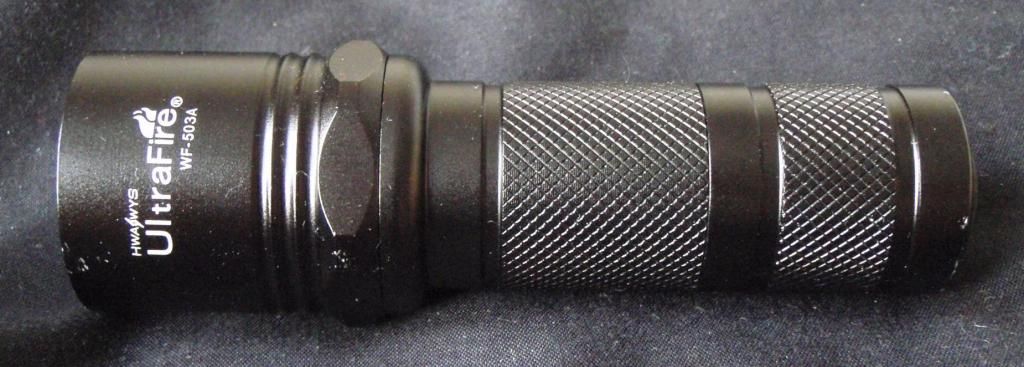 |
| WF-503a without extension tube |
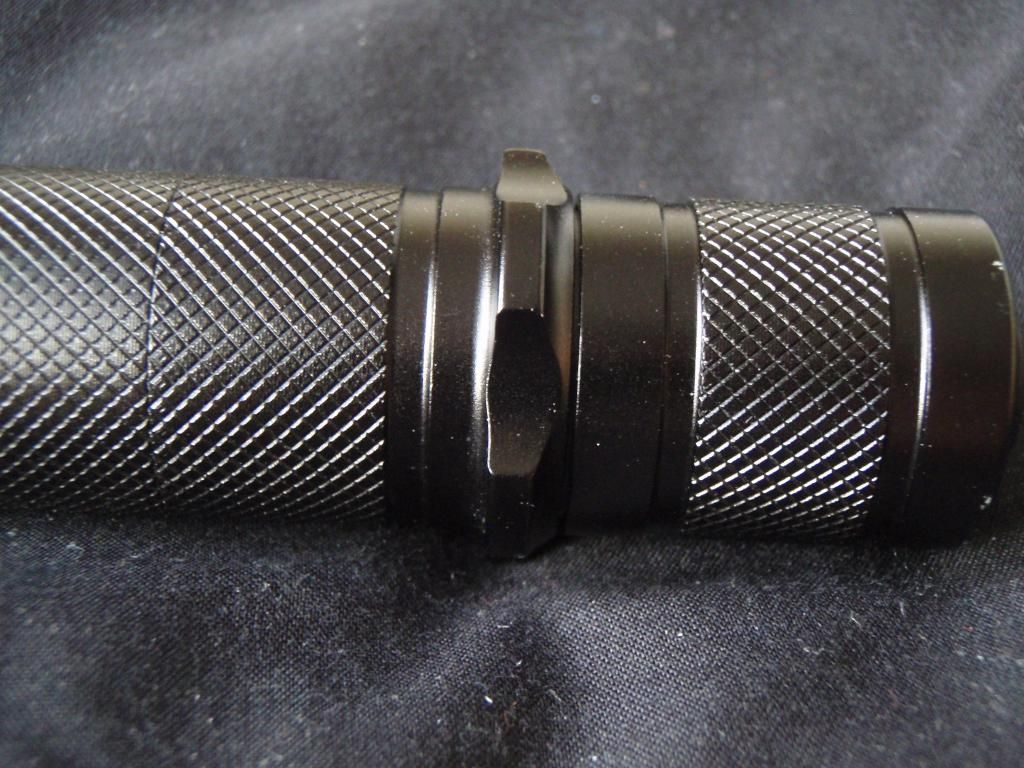 |
| Tailcap and extension tube |
The tailcap is well machined, featuring a hole to fit a
lanyard and a rather hard to press tailswitch. I improved the quality of the
tailswitch by putting a little bit of sheet plastic underneath the rubber cap -
this meant the cap had to be pressed in less before the switch was triggered.
The switch assembly is not sealed against water.
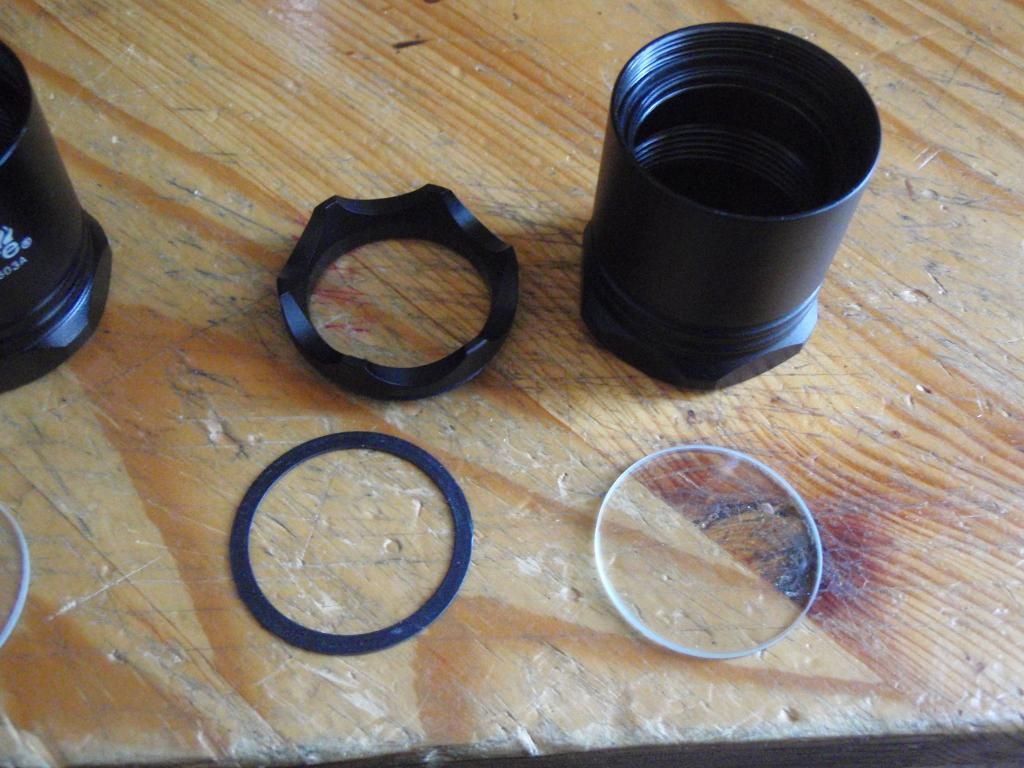
 |
| Head Assy on UF-762 Body |
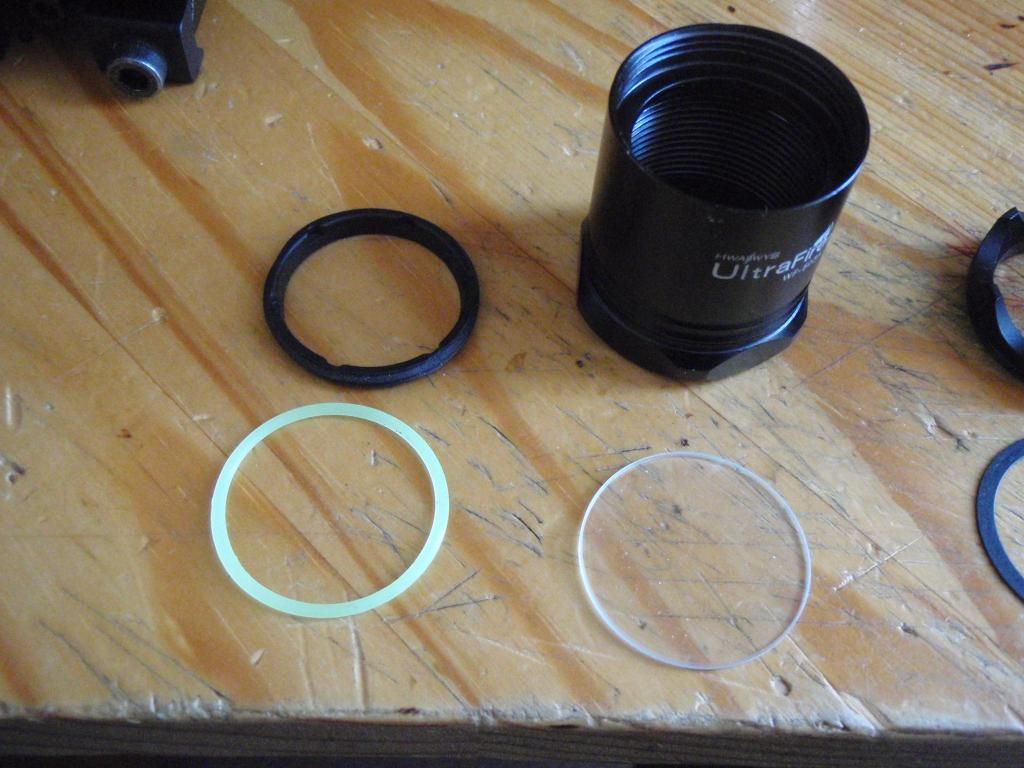 |
| Dismantled Head Assembly |
model cleanly engraved. The only two downsides of the head assembly are the bezel and the covering glass. The covering glass is quite thin - only 1.5mm, and the bezel (the ring that holds the glass into the head assembly) is made of plastic - I don't anticipate either of these components surviving a strike from a BB. There is a glow in the dark o-ring that seals between the glass and the head, meaning that water can only ingress from the rear of the torch.
The torch is bored out to accept high capacity batteries
- I currently run it on 16340 rechargeables, which are the same size as CR123a
batteries, however it can take larger diameter cells such as 18500 and 18650
cells if the right extension tubes are fitted. The torch came with a sleeve to
stop 16340s from rattling inside the
torch - a rather neat feature.
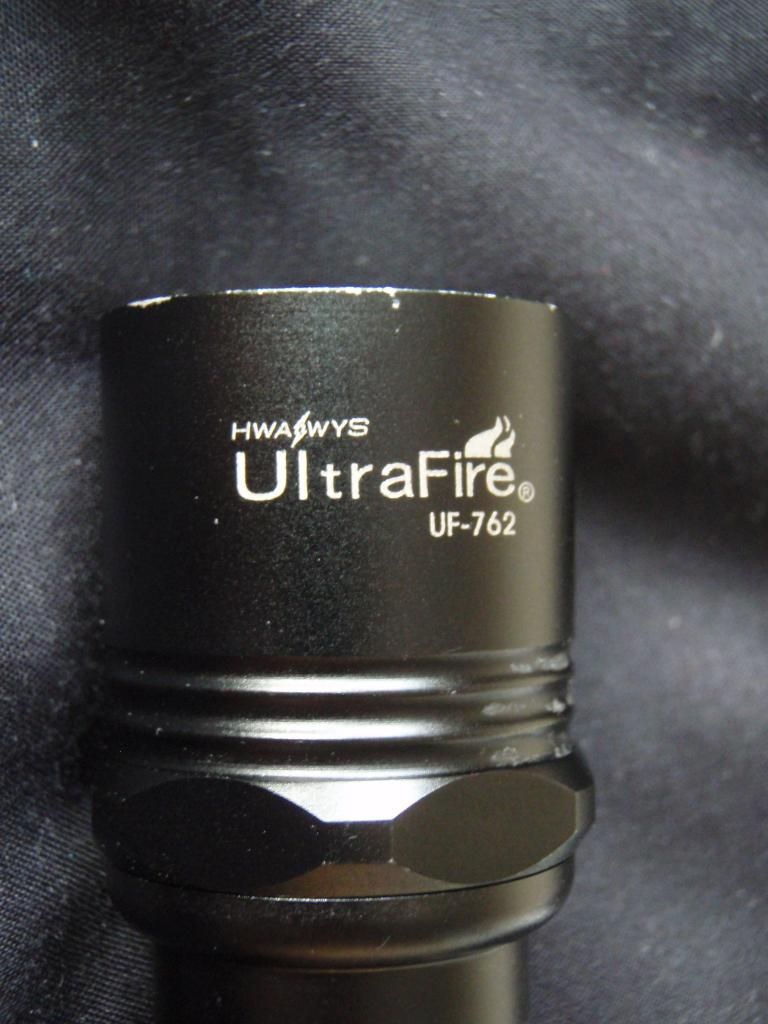
UltraFire UF-762
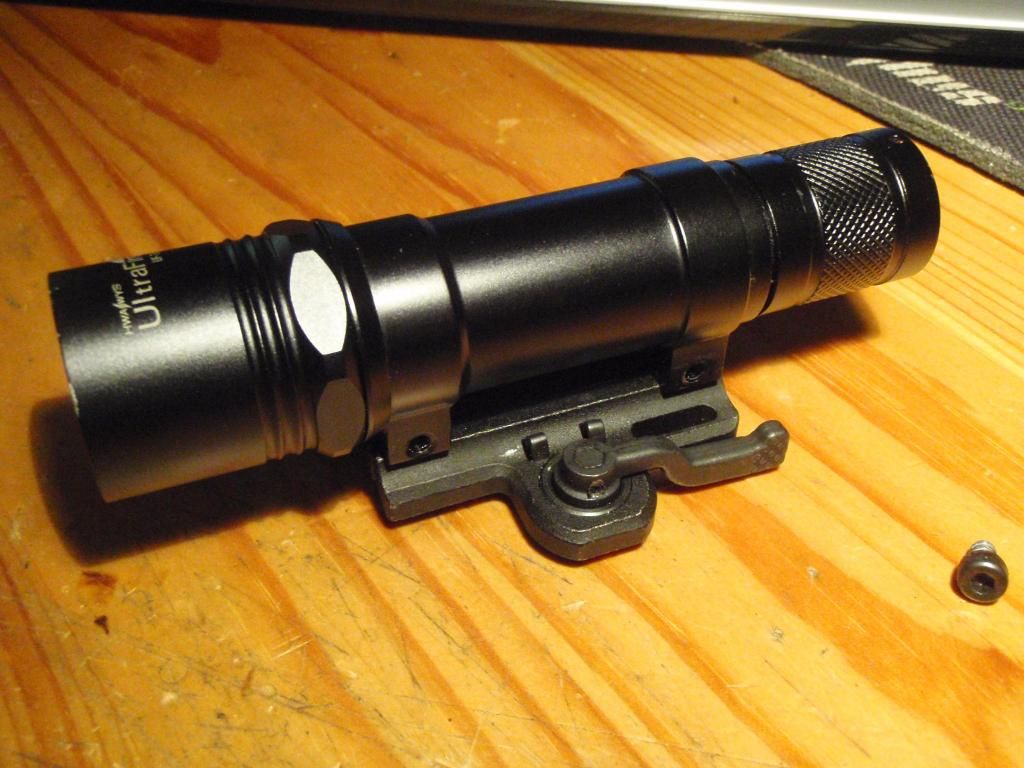 |
| UF-762 with ARMS #17 clone installed |
The second host I'll talk about is the UF-762.
Specifically this is a clone of the SureFire M620 weapon light.
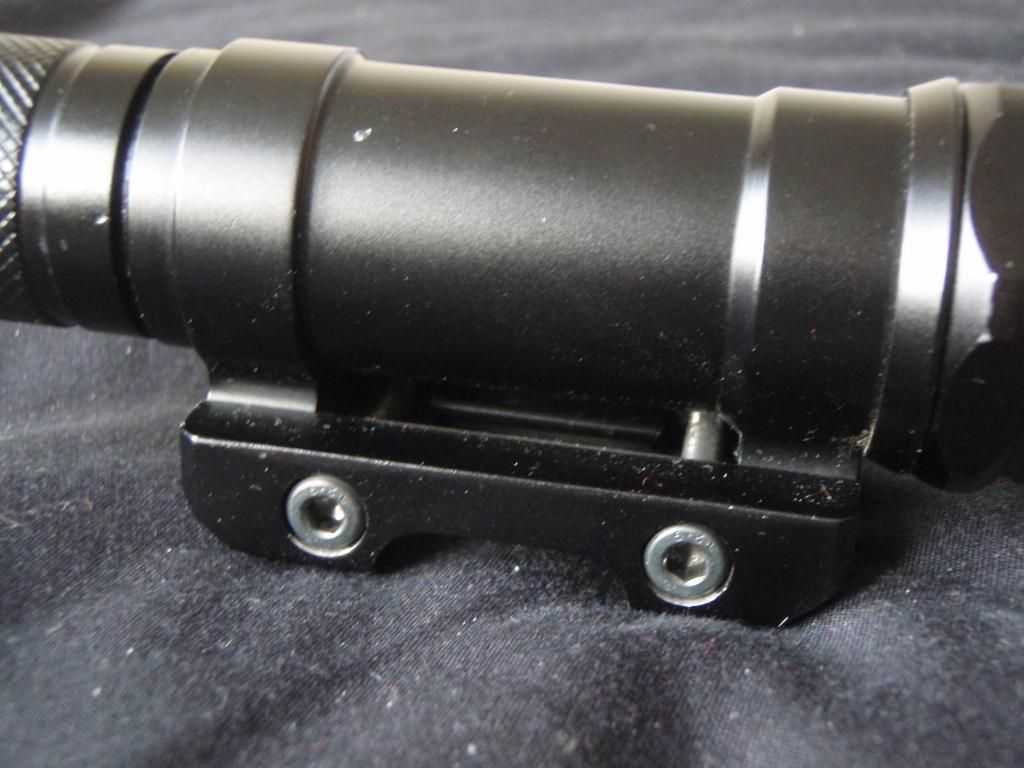 |
| The provided rail mount |
The rail mount can be removed, and replaced with any
mounting
system that fits a milspec channel, such as the ARMS #17 mount (my old friend), meaning you have a quick release torch that will solidly mount to your weapon system of choice.
system that fits a milspec channel, such as the ARMS #17 mount (my old friend), meaning you have a quick release torch that will solidly mount to your weapon system of choice.
 |
| The bottom of the mount |
 |
| UF-762 Head Assy |
soldered contacts, and the wire itself was incredibly stiff. Cutting open the pressure pad at the other end (by this point the heatshrink was already starting to tear) revealed very stiff springs and thin sheet brass as the connectors. The copper traces that completed the circuit board were completely worn away, explaining the intermittent connection problems.
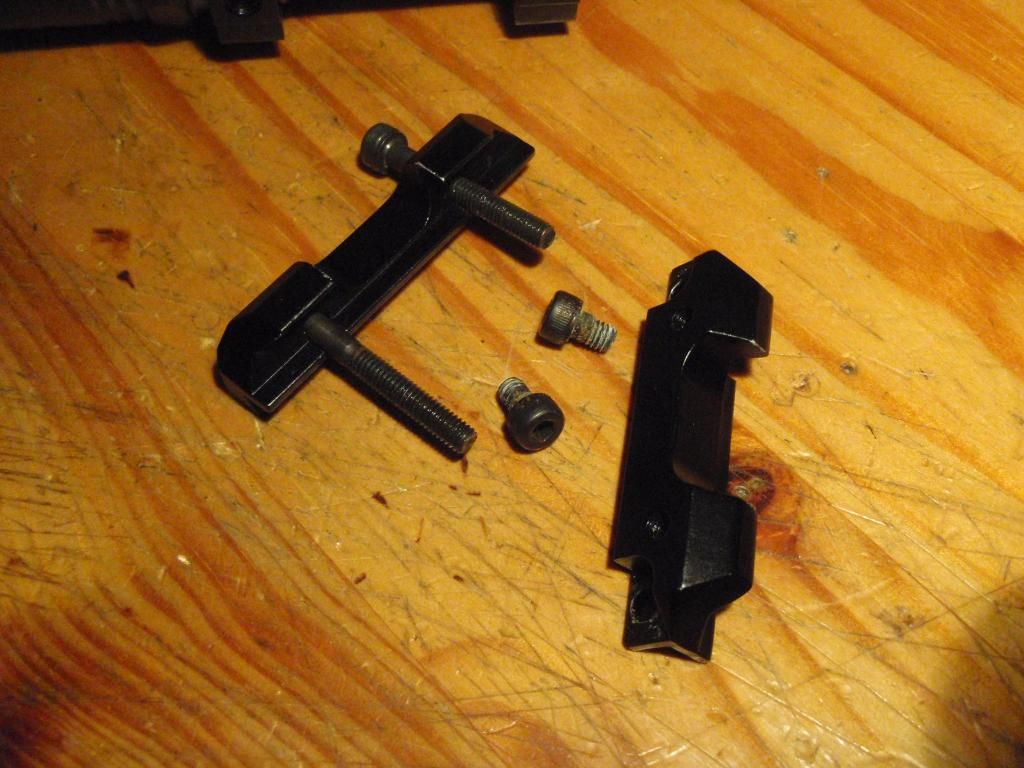 |
| The mount removed from the torch |
I made my own pressure pad and re-soldered the wires, and
for a time it was good - but the poor quality wiring let me down twenty minutes
into the weekender, and I switched to the button tailcap that came with the
503a.
The head assembly is identical to the 503a head assembly apart
from the torch model number.
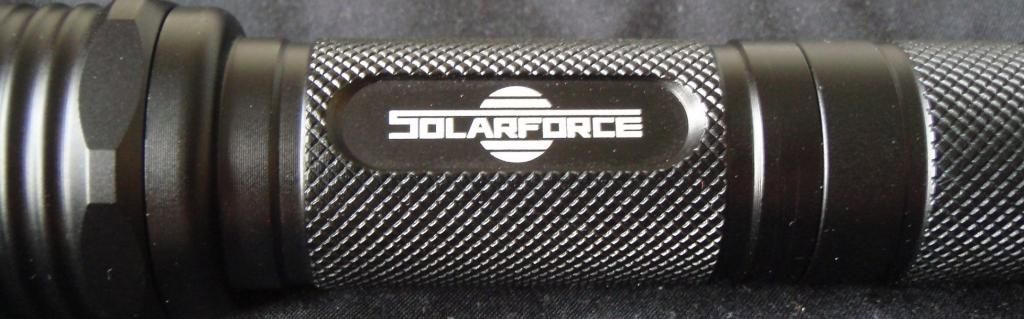
Solarforce L2

This is the cream of the bunch - I snapped this up for 20
quid second hand including a bulb, rail mount, clicky tailcap and pressure pad
tailcap. This was in response to a thread on zeroin forums in which I found out
that Solarforce tailcaps were not compatible with the Ultrafire torches that I
had (although Ultrafire do make a torch that is supposedly entirely 6P
compatible).
 |
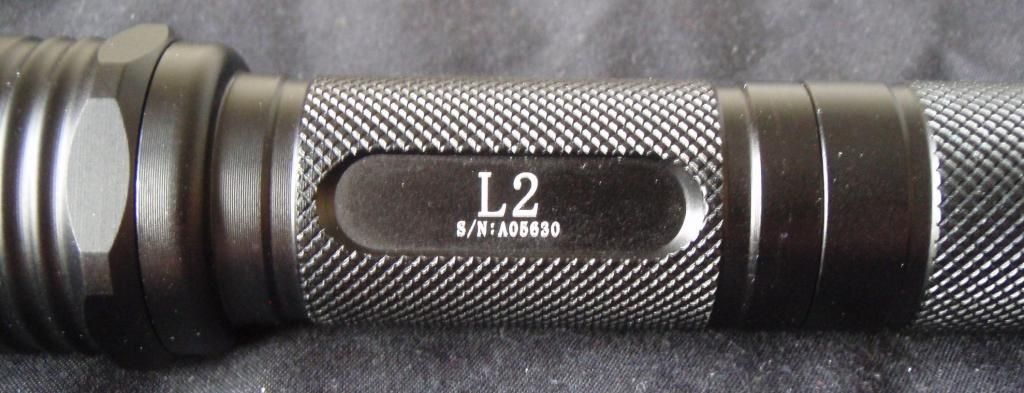
| The L2 Head Assembly |
The body sports crisp markings, including the Solarforce logo, the torch
model and a (legitimate) serial number.

Sure enough, as I had read the tailcaps were not
compatible with the 503a and the 762, however they were of much higher quality.
The tailswitch is a "forward click" switch, meaning that the light
switches on before the switch goes "click". This is great for
momentary switching on of the torch. The ultrafire tailcap is a "reverse
click" switch, meaning that the opposite is true - this makes momentary on
far trickier to manage.
 |
| Solarforce Pressure Switch |
The pressure switch tailcap is very well built, with the
pressure pad giving a tactile click when it is depressed.
The wire is also shorter, and much more flexible, however
once again strain relief is not really provided for, the glue that bonded the
insulation to the body of the cap having
long since failed. I intend to fix this by "potting" the wiring,
where one fills the hollow interior of the cap with epoxy, both water proofing
it and providing strain relief at the same time. Once again, the cap is fully
waterproof.
Ultrafire Cree XM-L T6 P60 Drop-in
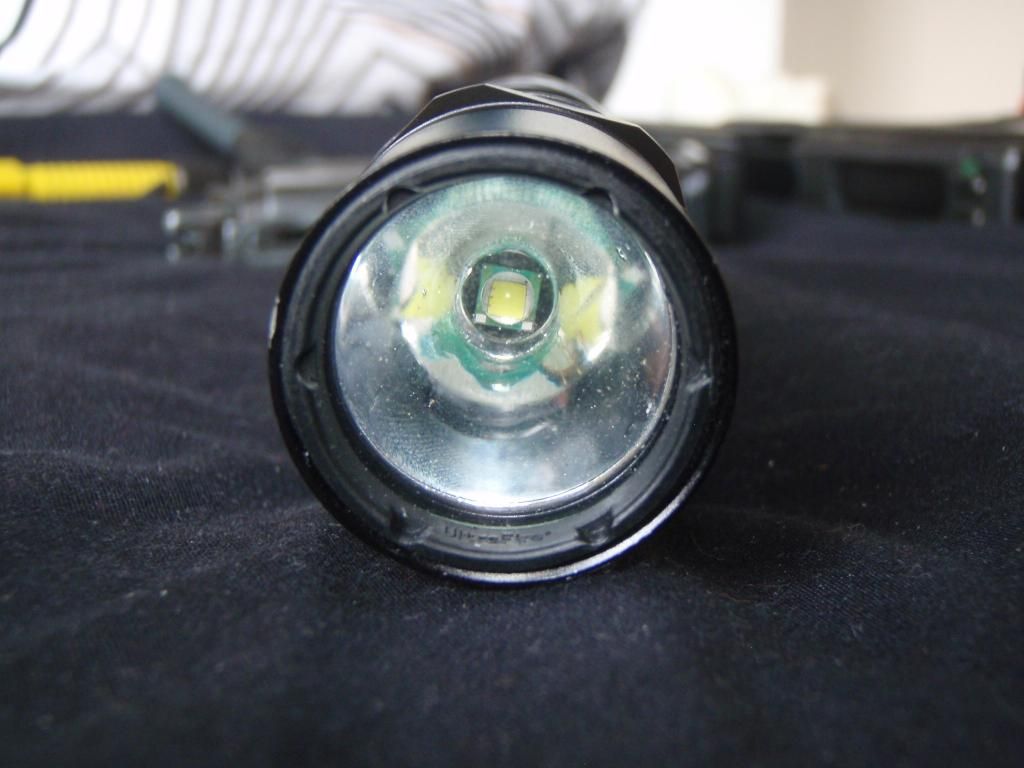 |
| Installed in the WF-503a |
The first of the two drop-ins I'm reviewing is a very
bright, unfocused unit. The name is quite complex, so I'll break it down.
Ultrafire refers to the company that has assembled the P60 unit, consisting of
a brass pill, an LED, a driver circuit and a reflector. Cree refers to the LED
manufacturer, in this case CREE, and XM-L is the model of LED used in the
drop-in.
On manufacture no two LEDs are created equal, and CREE
tests them all with the same voltage and current to measure the lumens output.
The LEDs are then separated into bins, with higher letters and numbers
indicating better (brighter) LEDs. The bin codes vary from model to model, and
T6 is about mid-range for the XM-L, with U2 being the brightest bin available.
Needless to say, an XM-L U2 based drop-in is going to be more expensive.
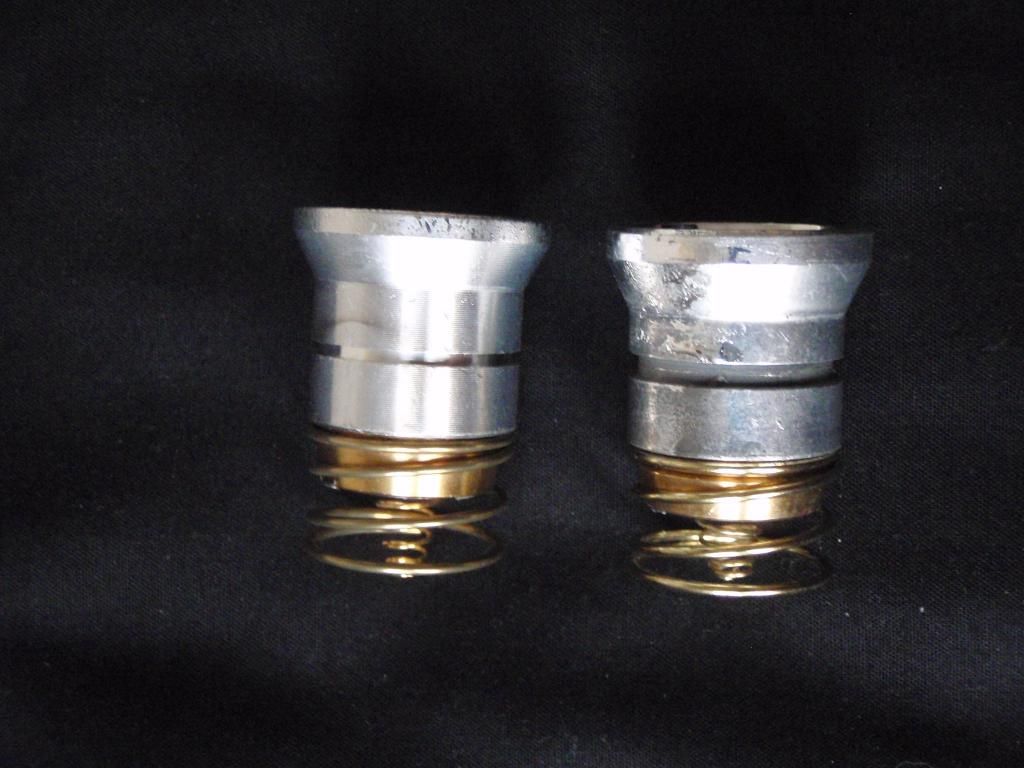 |
| Left: XR-E Drop-in Right: XM-L Drop-in |
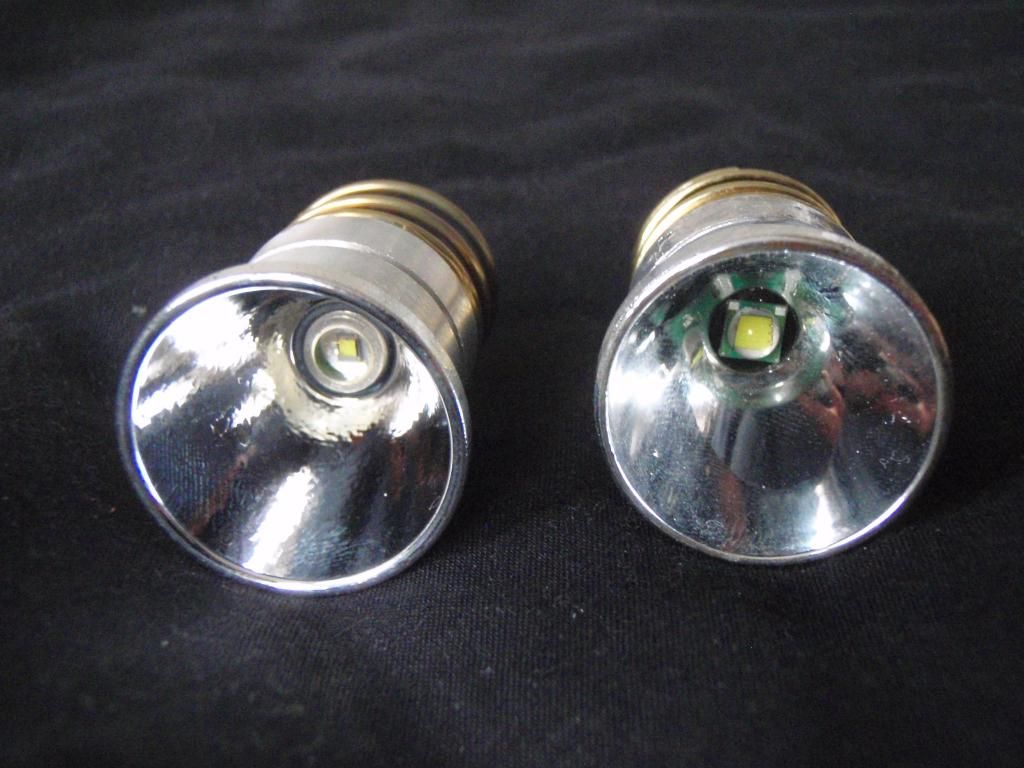 |
| Left: XR-E Drop-in Right: XM-L Drop-in |
The unit seems to be averagely assembled - the reflector
has mucky manufacturing markings on the outside, and a few minor flaws on the
smooth reflector surface. The circuit board is soldered to the pill in two
places, so I wonder whether this would withstand real weapon recoil.
Ultrafire Cree XR-E Q5 P60 Drop-in (single mode)
 |
| Installed in the L2 |
This drop-in has much more of a long-throw beam, but
overall is not as bright as the XM-L. The assembly quality is much higher on
this as well. The reflector is dimpled, and well made, with none of the
blemishes on the outside that were evident on the XM-L drop-in. The springs are
higher quality, and the soldering is better quality.
What I did find was that the XR-E LED delivers a very
good aiming spot - from 5 metres away the spot is torso sized - if your gun is
well set up you can just place the light spot on target and pull the trigger to
get a hit, making it very useful in CQB situations. As you can see from the pictures the LED itself is a lot smaller, with a
larger aspherical lens. I have a poor quality Insight M6 clone that uses the
same LED - once again the targeting capability of this torch really is useful.
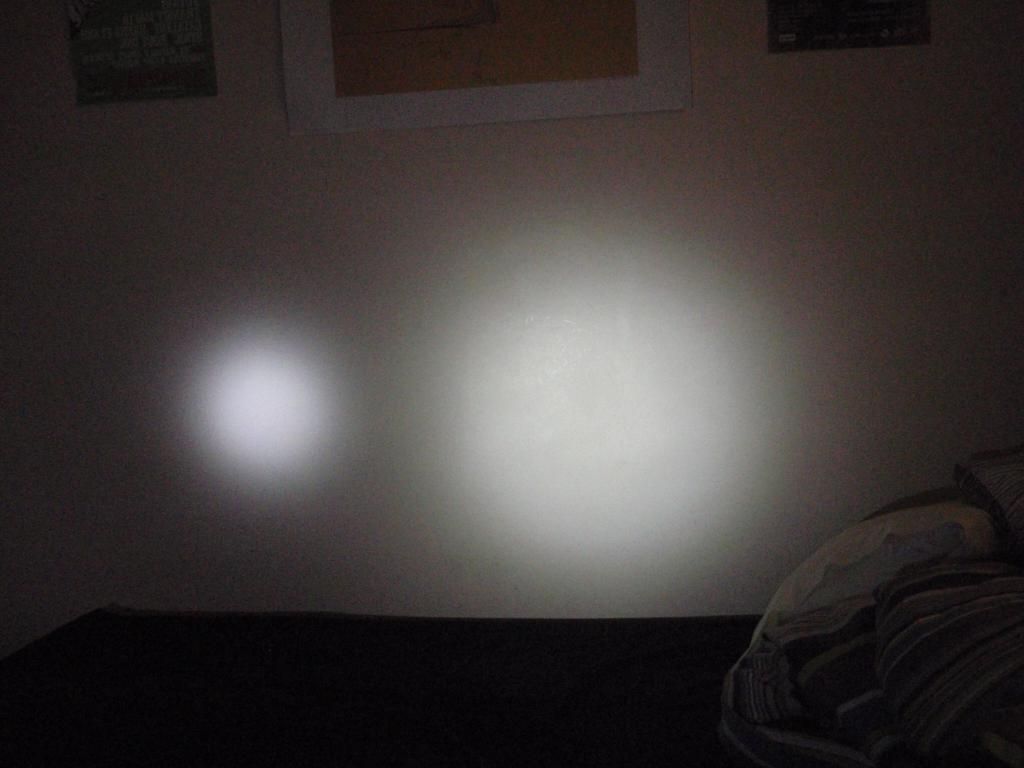 |
| Beamshot comparison. Left is XR-E and right is XM-L |
Conclusion
This has been a bit of a mammoth review, but there was a
lot to talk about. Sorry for the quality of some of the pictures - they were
taken quite late in the day, and I didn't have a tripod handy to stabilise the
camera.
Overall I'd recommend all of these torches to people
wanting weapon-lights for airsoft, but to the discerning user I would say that
the L2 is the best host, and the XR-E the best LED for the job on this budget.
The L2 can be fitted with a wide array of accessories, made by surefire and
solarforce. These include rail mounts, agressive bezels, head assemblies,
extension tubes with built in QD rail mounts, combo pressureswitch/button
tailcaps etc.
The UF-762 is a great torch, let down only by its rear
tailcap thread. Currently I have a broken arm so I can't do machining myself,
however I have a friend re-machining the rear of the 762 so that it can accept
solarforce and surefire tailcaps. Once I have had this done I will be
installing a solarforce head and tailcap and an ARMS #17 rail - then I will
have arrived at the ideal budget torch (though by that point it won't be that
budget any more).
Here are a few comparison photos of things that weren't included in the review:
Here are a few comparison photos of things that weren't included in the review:
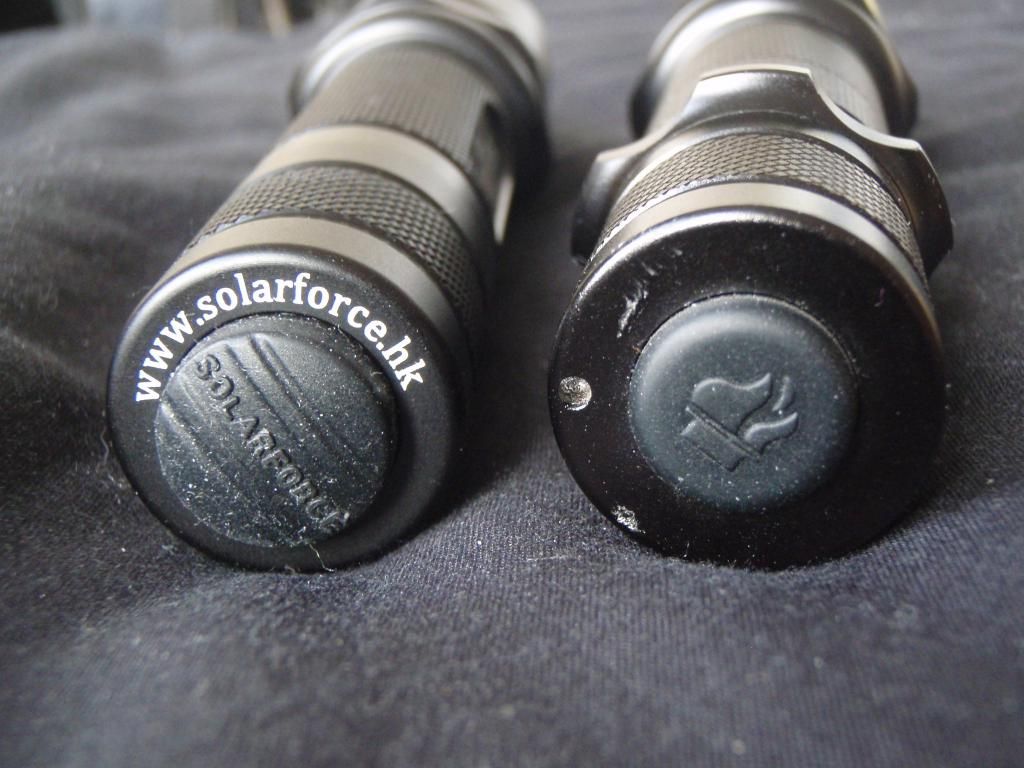 |
| Comparison of tailcaps (L2 on left) |
 |
| Comparison of head assemblies (L2 on left) |
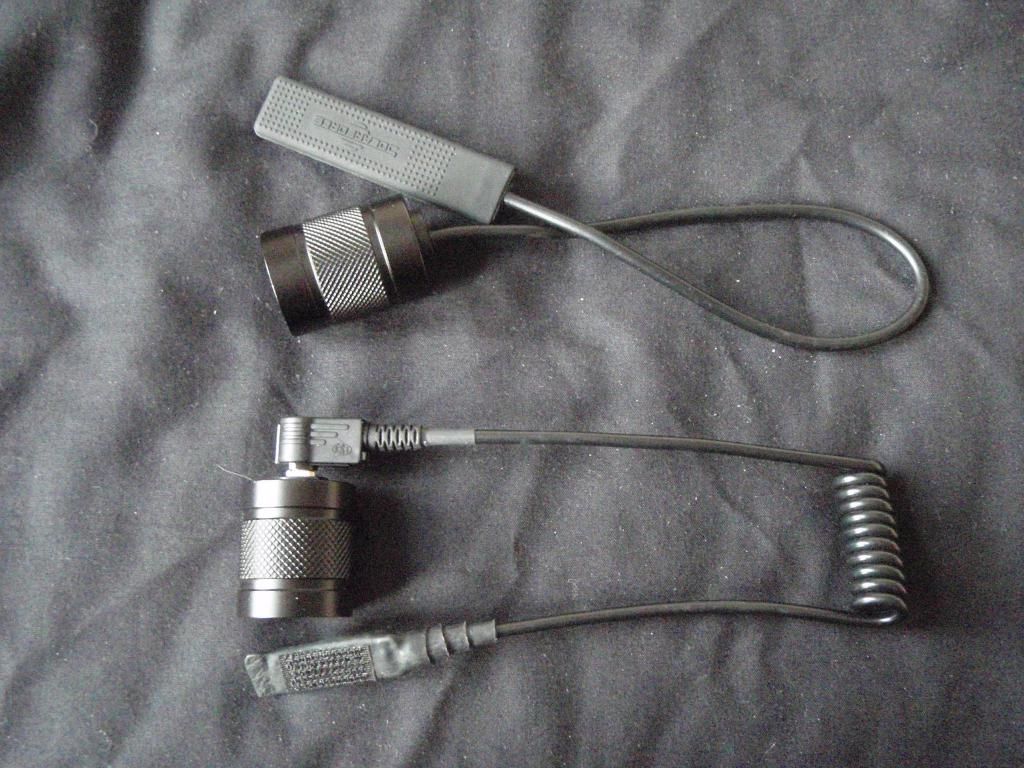 |
| Pressure switch tailcaps (L2 on top, homebrew on bottom) |
 |
| Lens comparison (L2 on left) |
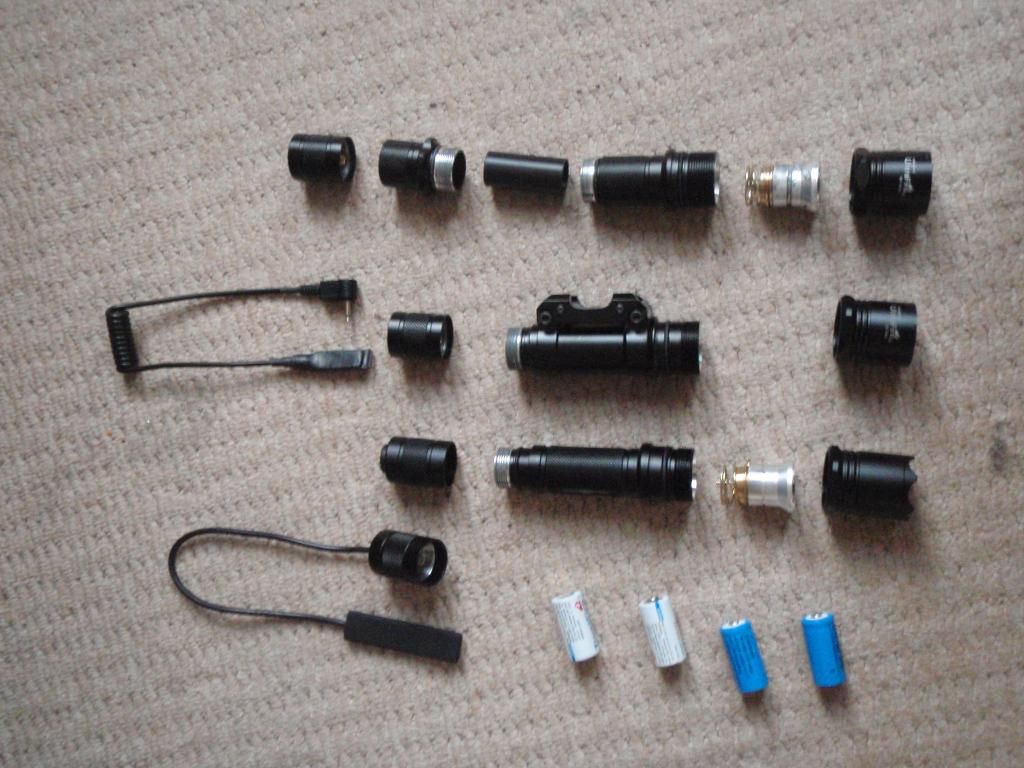 |
| All the torches stripped down. Top to bottom WF-503a, UF-762, L2, two CR123a cells (white) and two 16340s (blue) |
Saturday, June 1, 2013
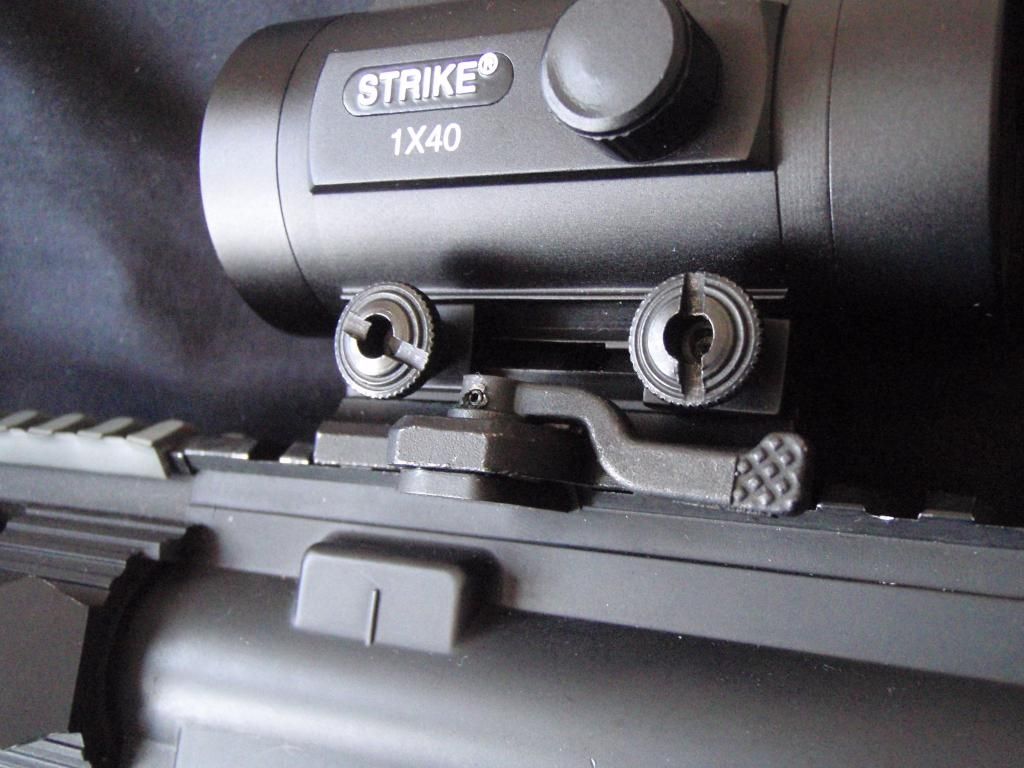
Review: Strike Systems 1x40mm Red Dot
Item Name: Strike Systems 1x40mm Red Dot
Item Type: Optic
Cost: £40
Item Type: Optic
Cost: £40
Overall Rating: 4/5
After spending a year airsofting with my faithful ebay
special red dot sight, I decided it was time to upgrade to something a bit
swisher. For me looks form a major part of whether I'll fit something to my
RIFs or not - if it looks (by the twisted yet beautiful standard of firearms)
good then it may have a place on my RIFs.
However, unlike some airsofters, I won't put something on my
guns that makes them slower to use, or hinders how they function (with one
exception - that would be the charging handle I have fitted to my M4, which is
purely aesthetic and can snag on clothing/webbing).
I headed to JD Airsoft to try out optics on my M4, as they
have quite a range. I initially had my eye on a T-1 or Eotech clone, however a
friend had pointed out the Strike Systems 1x40 Red Dot.
Strike Systems do a range of optics, both clones of real
ones as well as their own models. Invariably, there is a trade-off between
function and looks, with the better looking optics often having unusable or dim
reticles, or an exorbitant price tag.
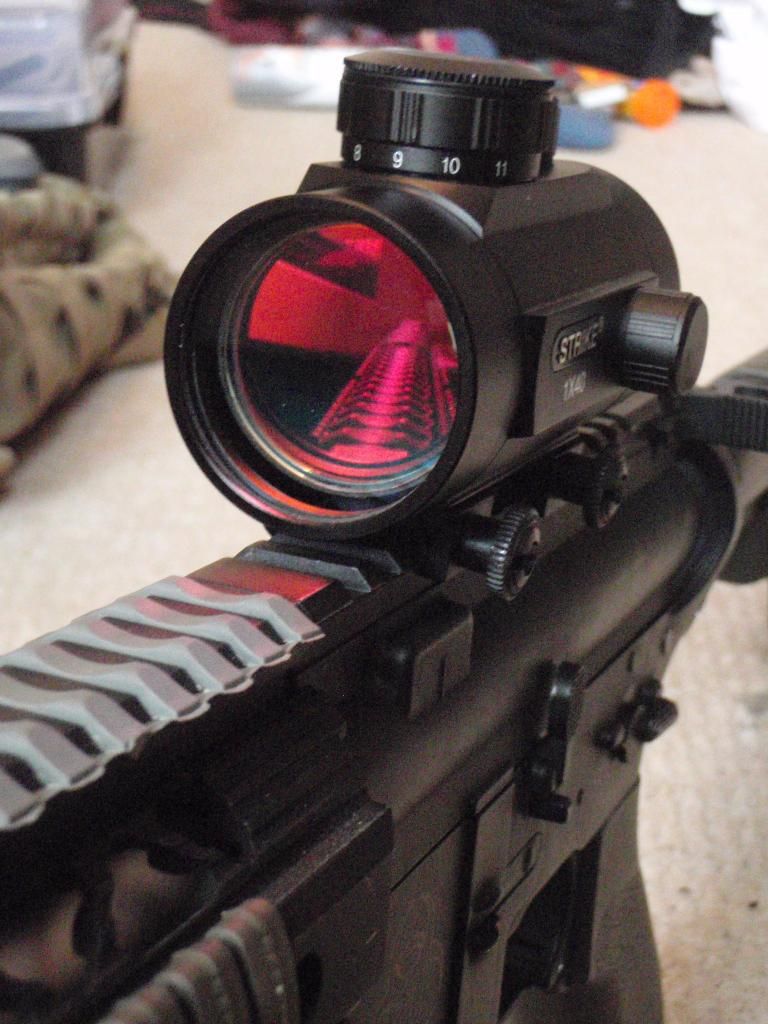 |
| Isn't that tint glorious?? |
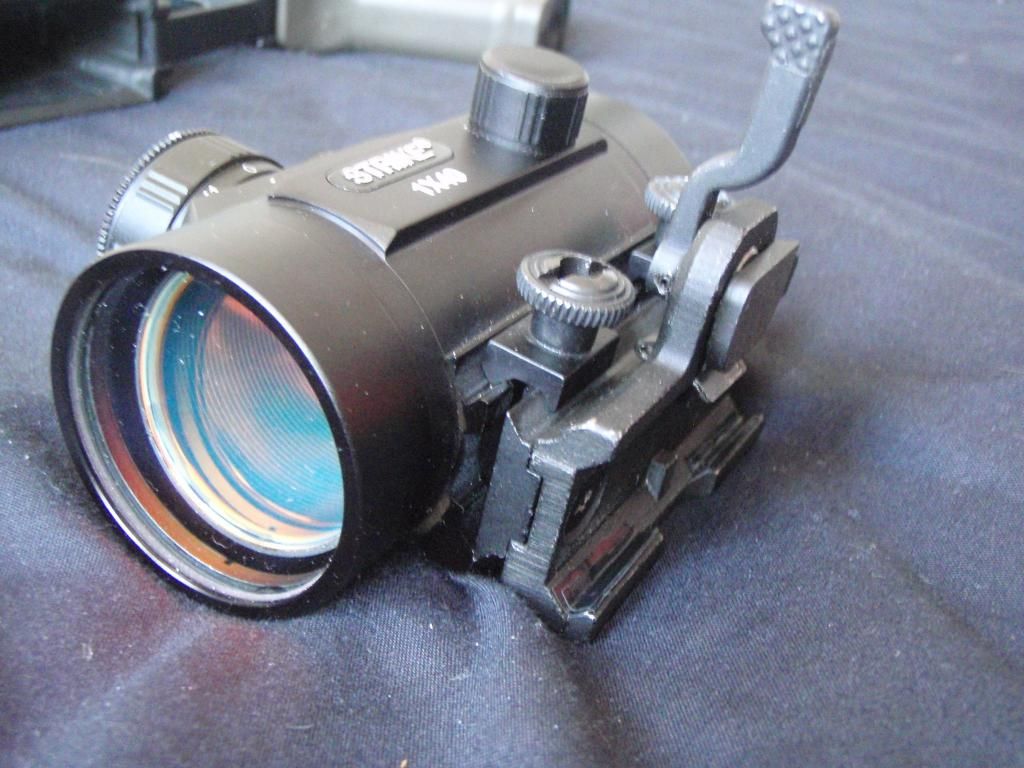
Of all of the sights I tried, this one came out tops. Looks
wise it isn't the prettiest optic, however it does look good. Effectively a
simple tube, the optic has plain glass lenses front and back, with a
beautifully red-orange coated reflex lens behind the front protective lens.
Machining quality on the body of the scope is acceptable - scrutiny of the
mounts shows some poor quality marks, and one of the screws has been mounted at
quite a wonky angle.
When I bought the optic I noticed that the mounts had been
poorly machined, after some persuasion I convinced the staff to exchange the
one I had bought with a better quality one. Out of the box it comes with two CR2032 batteries, a well written instruction manual and that is it.
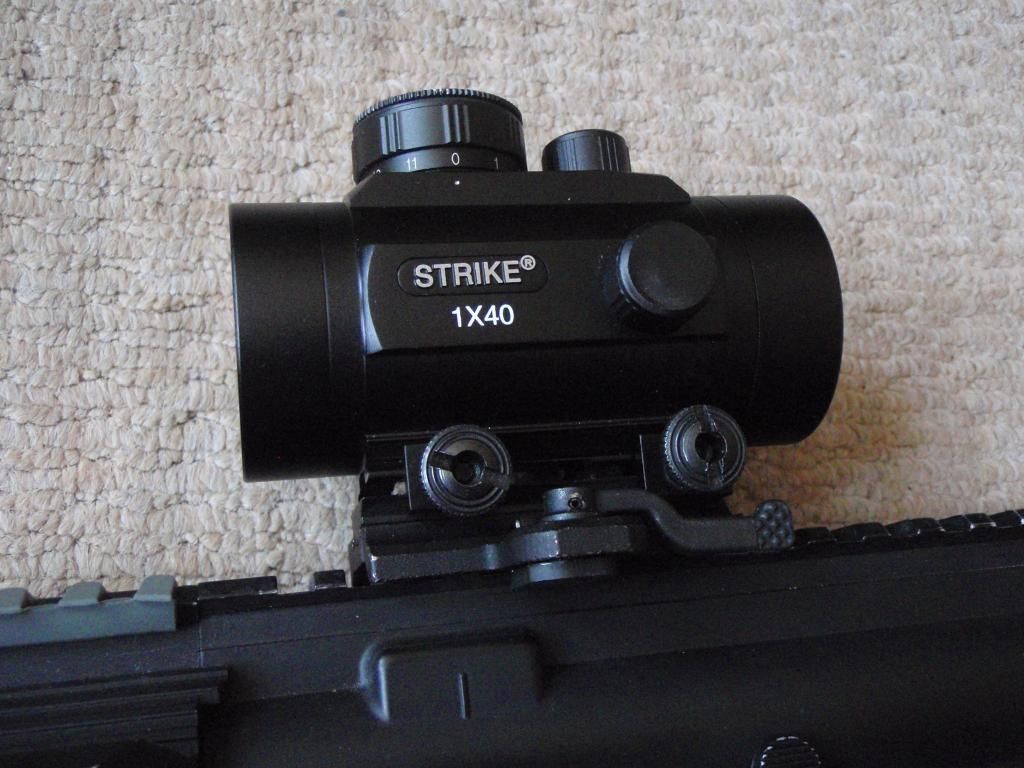
The sight features 11 brightness levels, making it useful in
low light conditions, but also ensuring usability in bright light (strong
summers day with no clouds). The dot is crisp and sharp, and unless viewed far
to the extreme left of the scope retains its shape. Parallax is roughly conserved
(as it can only ever be in a red-dot, a laser based holographic is the only way
to really eliminate parallax), however it is significantly better than some far
more expensive units (T-1 clones in particular).
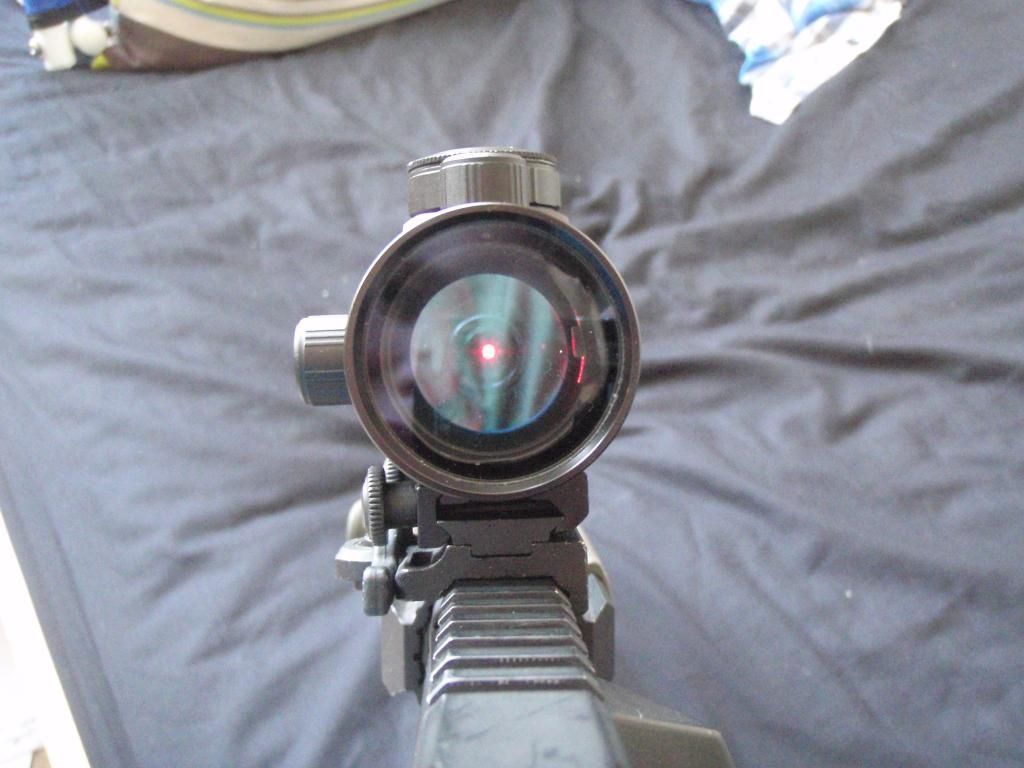 |
| As always, picking the dot up on camera is going to be tricky. A lot of the reflections are from the lens of the camera I used. |
 |
| Crisp - almost too crisp - trades are kept to a minimum. |
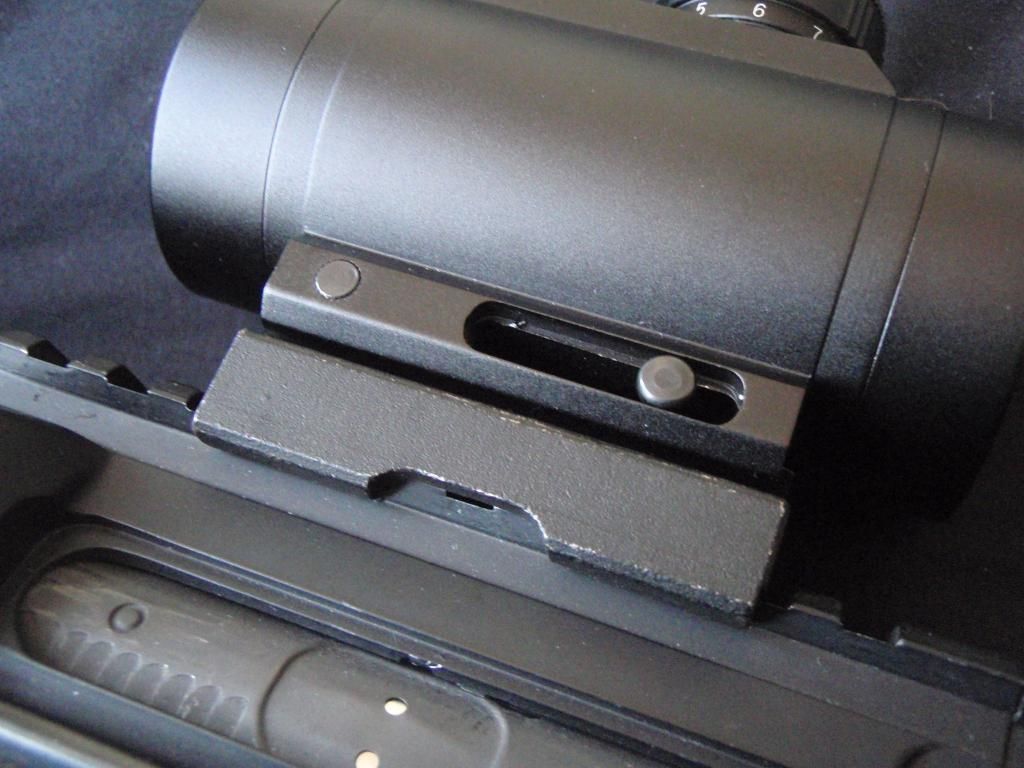
When it came to mounting the optic I discovered that one of
the two brackets/screws that made up the mount would not lock to the rail on my
Dytac receiver's rail. As this rail (like 90% of airsoft AR-15 uppers) is
off-spec, I tried it on my Dytac Invader RIS (much more on-spec) and found that
it locked up without being over-tightened, however it was still slightly loose. The QR rail I fitted the scope to for final use was bang on spec and sure enough the optic locks up nice and snugly against the rail.
One major drawback of having lenses so large is BB-strike -
I don't fancy skirmishing with this until I've sorted out some thick
polycarbonate covers for the front and back lenses. I'll be getting some
aluminium scope covers machined up, however the outer diameter of the lenses is
just under 45mm (.5mm or so), so if you can get clear scope covers at that
diameter then you may be able to sort something out quite easily. I doubt that
these covers will fit between the scope and rail system without a riser.
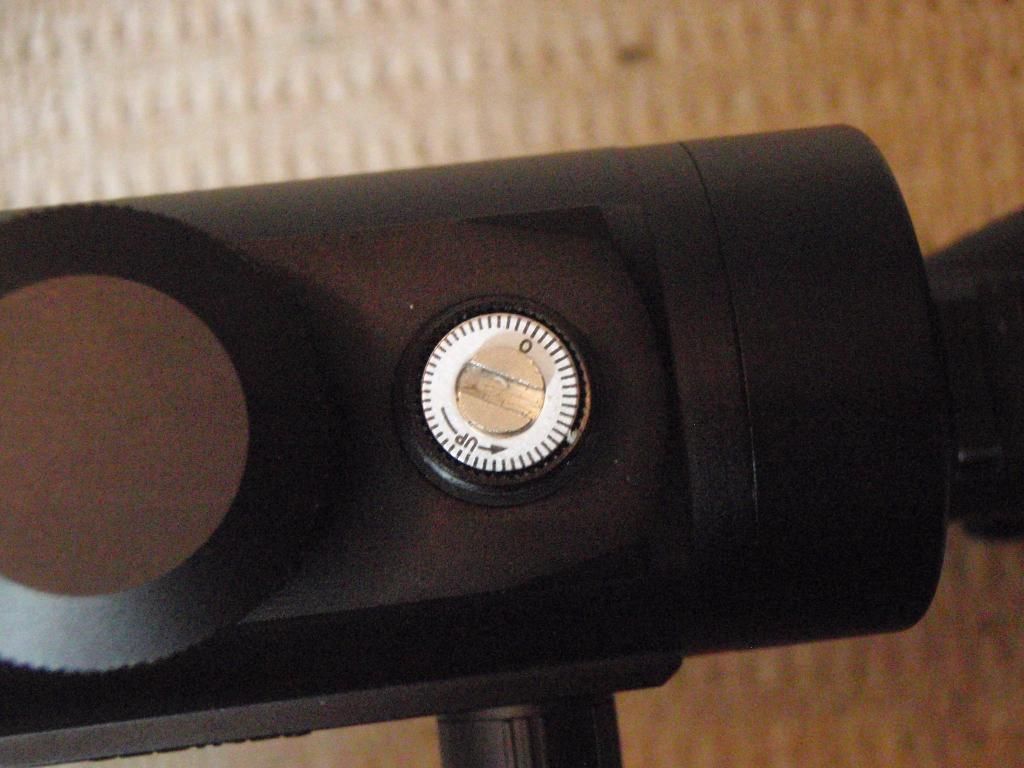 |
| The up down adjustment turret with its cover removed. |
Zeroing the scope is easy to do, the supplied instruction
manual indicates the adjustment per (very pleasantly audible) click from the
zeroing turrets, which are hidden underneath light-weight thin aluminium
covers. The adjustment is 1" at 100 yards, or 1 MOA.
Before getting this review online the riser (all 120 glorious cheaply forged grams of it) arrived. It really does make a difference to how the optic looks on the gun (think a t-1 on a riser on steroids), and makes it far more comfortable to aim. The riser is a clone of the A.R.M.S. #17DR base, and for me it reflects one of those aspects that a lot of people in the hobby aren't that fussed by, but really gets me far too exited, and you'll see why in my review when I get round to it.
The optic installed on a clone #17DR riser - much more "military looking".
To summarise - for 40 quid this is an incredible optic,
however more will need to be spent in order to protect it. The riser has cost me £20, and I am not yet sure how much the lens protectors will cost.
The lenses are
incredibly clear, the coating is effective (increasing the contrast between the
reticle and the target) and targets are
very easy to acquire. For plinking in your garden this is definitely one to
consider, and I will definitely be running this as my primary optic as soon as
I can sort out some heavy protective covers for the lenses.
As and when I get the covers made I'll update this review.
Dave out.
Monday, March 4, 2013
Review: Meprolight ML-10224 TRU-DOT Night Sight System for Glock 9 mm, .357 Sig, .40 & .45 GAP Pistols
Item Name: Meprolight ML-10224 TRU-DOT Night Sight System for Glock 9 mm, .357 Sig, .40 & .45 GAP Pistols
Item Type: Sights
Cost:£52 including postage from Rockyourglock.com
Overall Rating: 4.5/5
The Definitive Guide to the KSC Glock Platform
To my glee (and my bank account's groan) I discovered that KSC Glocks can be fitted with real sight systems, so I thought I'd give it a crack. What follows is my initial findings on these sights, and as this review is getting on for 9 months old I'll update it with my thoughts on them after all that time airsofting.
Throughout this review I use the acronym RS - meaning Real Steel, a term (often interchangeable with Real Deal) for parts and equipment manufactured for real firearms or for real combat, as opposed to for airsoft.
Meprolight manufacture these sights in three colour options - Green, Green Front/Yellow Rear, Green Front/Orange Rear, with the orange rear being significantly more expensive.
After reading on Airsoft Retreat that KSC Glocks can take RS sights perfectly I took the plunge and bought them. They cost 52 quid including postage from rockyourglock.com, a US website that ships RS stuff (except barrels, slides, frames and complete pistols) anywhere in the world. Update - I received a message on ZeroIn Airsoft Forums the other day informing me that they do not ship tritium outside of the US - whether this is true or not I do not know.
The sights arrived 6 working days after dispatch (the same day i bought them) in a signed for bubble envelope.
The sights come in simple packaging that includes a worldwide warranty (warranting the lamps on TRU-DOT sights for 12 years of visible glow - the longest on the market) installation instructions and a small flier for their other products.
They are manufactured from Steel, with the tritium lamps being glass with a white polymer ring behind them for bright light sighting. All of this is capped with (according to the forums, Meprolight's website is sketchy at best)an artificial sapphire which makes the sights very rugged/easy to clean.
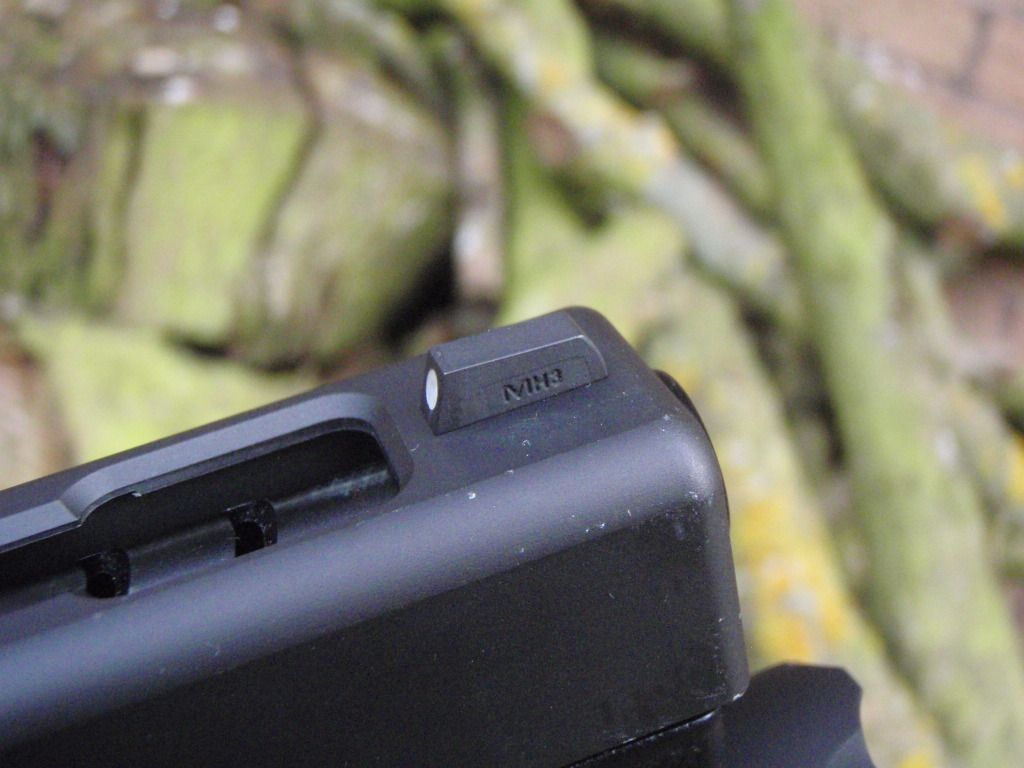
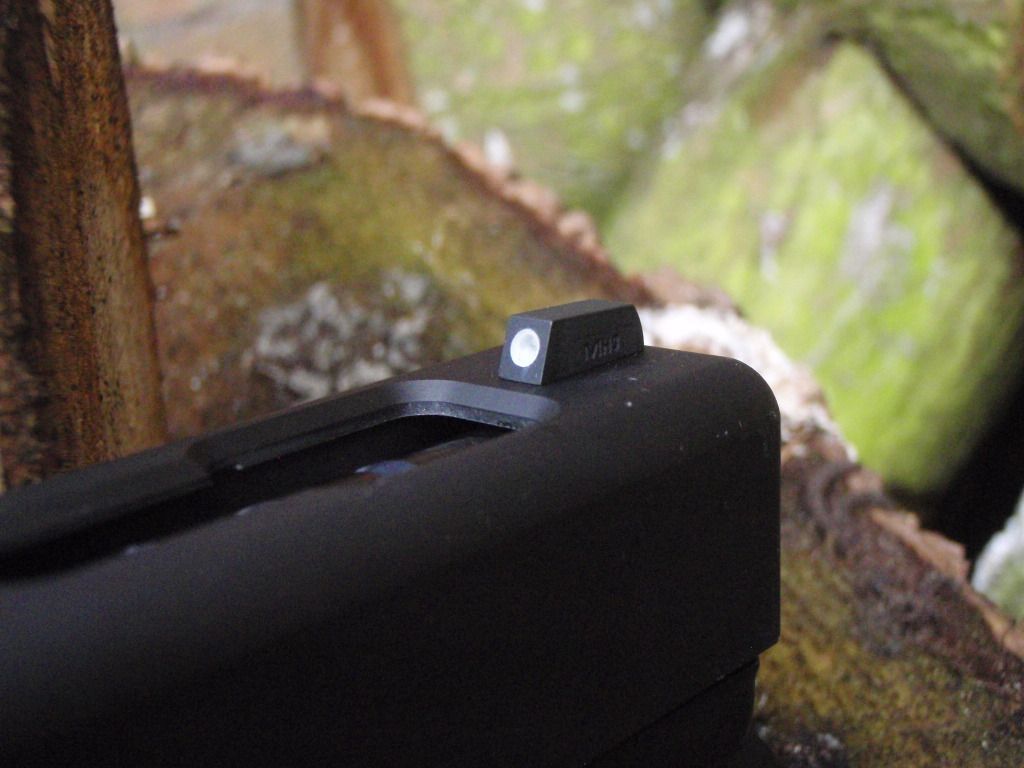
The sights have crisp manufacturer markings, and the rear has TRU DOT in green printed on the side of the sight - this indicates the quality of the Lamps being used. The rear sight also has a batch number engraved on it's underside. The sights are square and chunky, with the front of the front sight being rounded off slightly.
Please note from here in (unless i say otherwise) fitting is to a PGC Glock 18C metal slide, that has never had any sight fitted to the front sight hole, and only ever had stock KSC plastic rear sights fitted.
I began with the front sight - removing the provided screw and pushing it into the front sight hole. The sight push fit almost all the way in, requiring a few taps with a hammer to seat it the last .5 of a mm. After that I wound the screw into the back by hand, using pliers to tweak it the last bit. You can use the proper glock front sight tool, but i didnt particularly fancy spending another 15 quid on that.
Update - Recently (after an estimated 5000+ rounds later) I stripped the slide completely and found that the bolt had not loosened at all - just to be sure on reassembly I added a dab of loctite 243.
The rear sight (contrary to expectations) was VERY loose, with a noticeable bit of forwards/backwards play. I tried the rear sight on the stock KSC plastic slide, and found it to be exactly the same.
I ended up developing (in conjunction with user sparrowhawk on ZeroIn) the following method, using some thin plasticard (approx 0.5mm) and an M3(coarse)x4 grub screw.
First off remove the BBU screw, and wind the grub screw into the thread insert/nut from below till it looks like so:

Next you need to cut a thin strip of plasticard/packing material that will sit behind the rear sight as can be seen here. It may need to be tapered on one side to fit, I know on mine it is a tough press fit to slide the sight in.
 Having fitted the rear sight in the right place, go back under the BBU and wind the grub screw up into the underside of the sight, securing it firmly in place. After doing this I needed to cut some material off the screw holding the BBU in, but it is still firmly secured. Once again, a dab of Loctite 243 secures it all nicely.
Interestingly the sight is narrower in total width than the stock plastic sight, however it is JUST wide enough to cover the hole through which the selector grub-screw is fitted on a G18, and this is a pretty good indicator of whether the sight is central. The rear of the sight overhangs the dovetail, and there is a slight clearance between the slide and the bottom of this overhang, however it is nothing too critical.
Once installed they look like this:


Drawing and holstering the pistol with these sights was a breeze, as they are the same height as standard G17 combat sights. Drawing will result in wear on the top of the holster over time, as the rear edges of the front sight are quite sharp.
Update - after 10+ skirmishes my holster (and the sights) are both absolutely fine. The black finish has worn on the corners of the sights, but that is it.
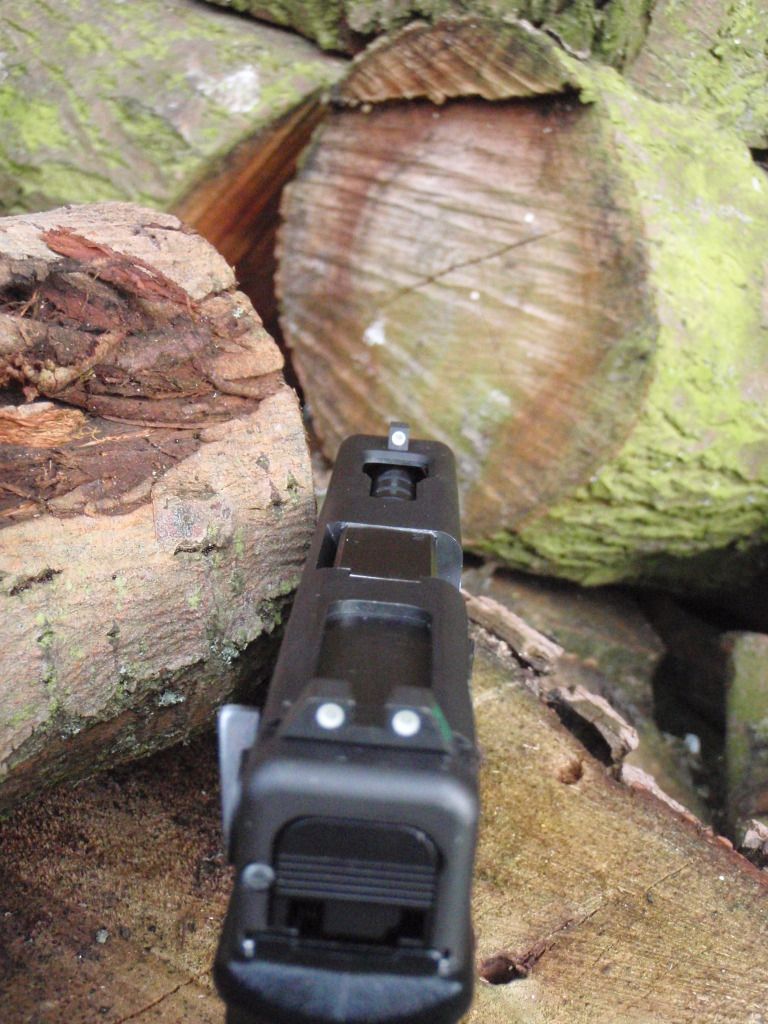
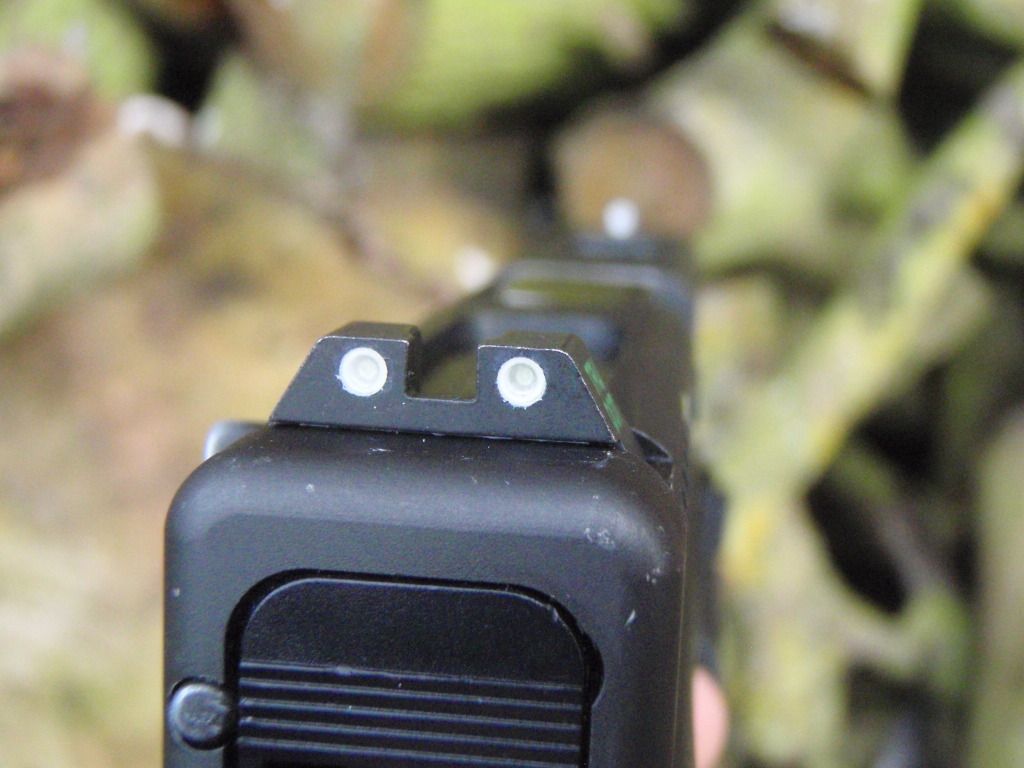
Quick aiming with the sights is quite readily acheivable as the front sight is more slender than some night sights (the XS Big Dot system springs to mind here), and the sights transition beautifully from light-gloomy-dark. They glow very well, and produce quite crisp circles. The white polymer rings are extremely visible, and I found the combination of three dots/sillhouette to be very useable when shooting in the dark with a torch (an ASG Xenon bulb, as seen in the photos above).
Update - shortly after I originally wrote this review I used this pistol alone for 6 hours at a game at Brit-Tac's (excellent, but now demolished) central Sheffield site. They performed flawlessly, allowing me to pick off targets illuminated by other people's torches - I got the kill, but they couldn't see where I was!!
Finally, the slide (when locked back) can be very easily released by raking the rear sight downwards over clothing, or by pulling back on the front of the rear sight due to its square profile, increasing the flexibility of your preferred drills.
Item Type: Sights
Cost:£52 including postage from Rockyourglock.com
Overall Rating: 4.5/5
Introduction
Most of us have played Call of Duty, or another game series in which the pistols had sights that glowed green faintly in darkened rooms. Until I got into airsoft I thought it was just something the developer's added for that "cool factor", however on buying a KSC Glock and reading this guide all that would change:The Definitive Guide to the KSC Glock Platform
To my glee (and my bank account's groan) I discovered that KSC Glocks can be fitted with real sight systems, so I thought I'd give it a crack. What follows is my initial findings on these sights, and as this review is getting on for 9 months old I'll update it with my thoughts on them after all that time airsofting.
Throughout this review I use the acronym RS - meaning Real Steel, a term (often interchangeable with Real Deal) for parts and equipment manufactured for real firearms or for real combat, as opposed to for airsoft.
Background
Meprolight are a manufacturer of RS sighting systems (amongst other things) - they manufacture the tritium lamps that Glock use in their own sights. Amongst the cheapest (and according to the RS forums), brightest and (according to the majority of RS users that i could find) best night sights on the market.Meprolight manufacture these sights in three colour options - Green, Green Front/Yellow Rear, Green Front/Orange Rear, with the orange rear being significantly more expensive.
After reading on Airsoft Retreat that KSC Glocks can take RS sights perfectly I took the plunge and bought them. They cost 52 quid including postage from rockyourglock.com, a US website that ships RS stuff (except barrels, slides, frames and complete pistols) anywhere in the world. Update - I received a message on ZeroIn Airsoft Forums the other day informing me that they do not ship tritium outside of the US - whether this is true or not I do not know.
The sights arrived 6 working days after dispatch (the same day i bought them) in a signed for bubble envelope.
Overview
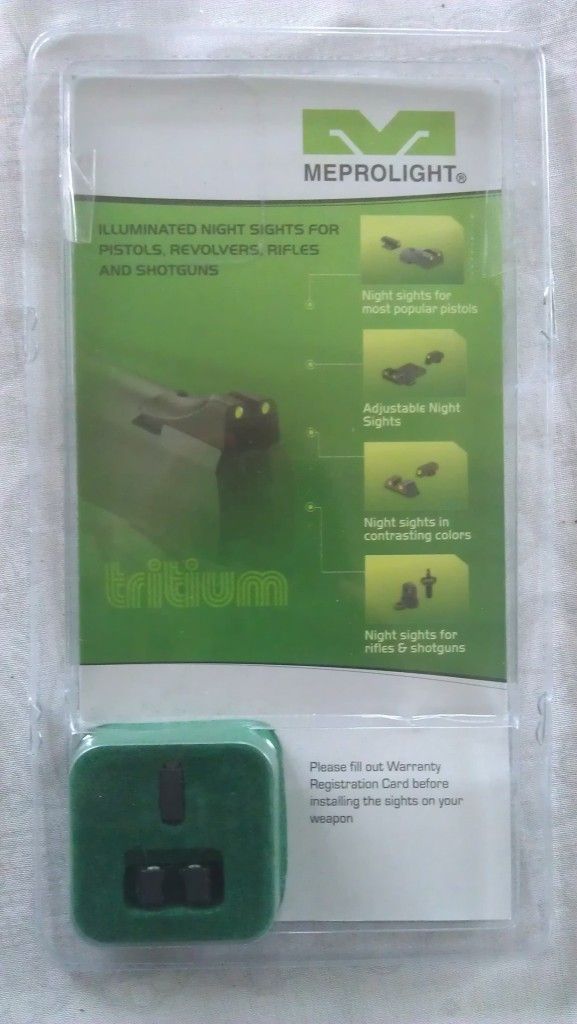 |
| The packaging |
They are manufactured from Steel, with the tritium lamps being glass with a white polymer ring behind them for bright light sighting. All of this is capped with (according to the forums, Meprolight's website is sketchy at best)an artificial sapphire which makes the sights very rugged/easy to clean.
The sights have crisp manufacturer markings, and the rear has TRU DOT in green printed on the side of the sight - this indicates the quality of the Lamps being used. The rear sight also has a batch number engraved on it's underside. The sights are square and chunky, with the front of the front sight being rounded off slightly.
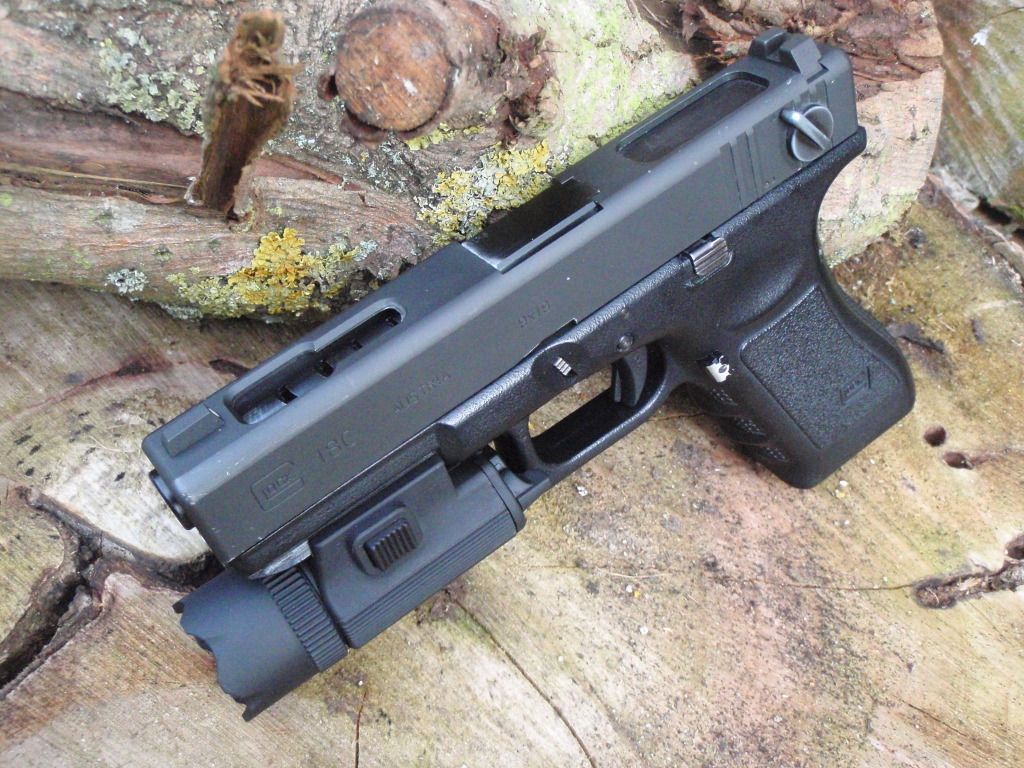 |
| The sights fitted to my KSC G18c - the front sight has a distinctive profile. |
Installation
 |
| Front Sight Screw |
I began with the front sight - removing the provided screw and pushing it into the front sight hole. The sight push fit almost all the way in, requiring a few taps with a hammer to seat it the last .5 of a mm. After that I wound the screw into the back by hand, using pliers to tweak it the last bit. You can use the proper glock front sight tool, but i didnt particularly fancy spending another 15 quid on that.
Update - Recently (after an estimated 5000+ rounds later) I stripped the slide completely and found that the bolt had not loosened at all - just to be sure on reassembly I added a dab of loctite 243.
The rear sight (contrary to expectations) was VERY loose, with a noticeable bit of forwards/backwards play. I tried the rear sight on the stock KSC plastic slide, and found it to be exactly the same.
I ended up developing (in conjunction with user sparrowhawk on ZeroIn) the following method, using some thin plasticard (approx 0.5mm) and an M3(coarse)x4 grub screw.
First off remove the BBU screw, and wind the grub screw into the thread insert/nut from below till it looks like so:

Next you need to cut a thin strip of plasticard/packing material that will sit behind the rear sight as can be seen here. It may need to be tapered on one side to fit, I know on mine it is a tough press fit to slide the sight in.

Interestingly the sight is narrower in total width than the stock plastic sight, however it is JUST wide enough to cover the hole through which the selector grub-screw is fitted on a G18, and this is a pretty good indicator of whether the sight is central. The rear of the sight overhangs the dovetail, and there is a slight clearance between the slide and the bottom of this overhang, however it is nothing too critical.
Once installed they look like this:

Shooting/Operation
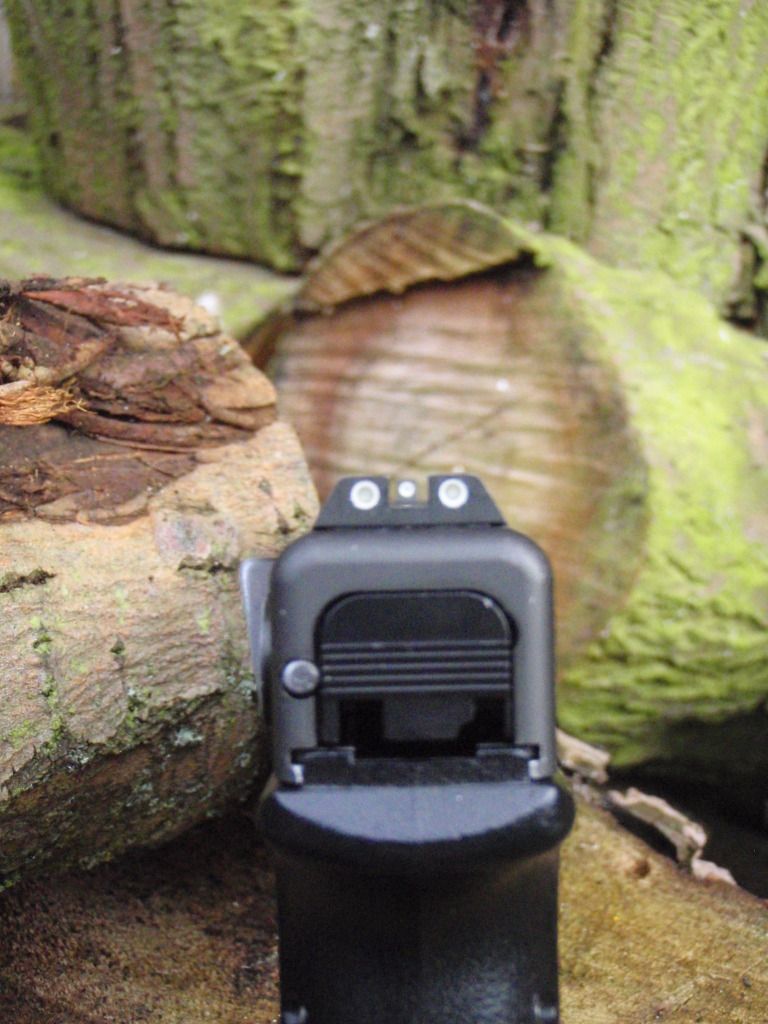 |
| Sight Picture |
Update - after 10+ skirmishes my holster (and the sights) are both absolutely fine. The black finish has worn on the corners of the sights, but that is it.
Quick aiming with the sights is quite readily acheivable as the front sight is more slender than some night sights (the XS Big Dot system springs to mind here), and the sights transition beautifully from light-gloomy-dark. They glow very well, and produce quite crisp circles. The white polymer rings are extremely visible, and I found the combination of three dots/sillhouette to be very useable when shooting in the dark with a torch (an ASG Xenon bulb, as seen in the photos above).
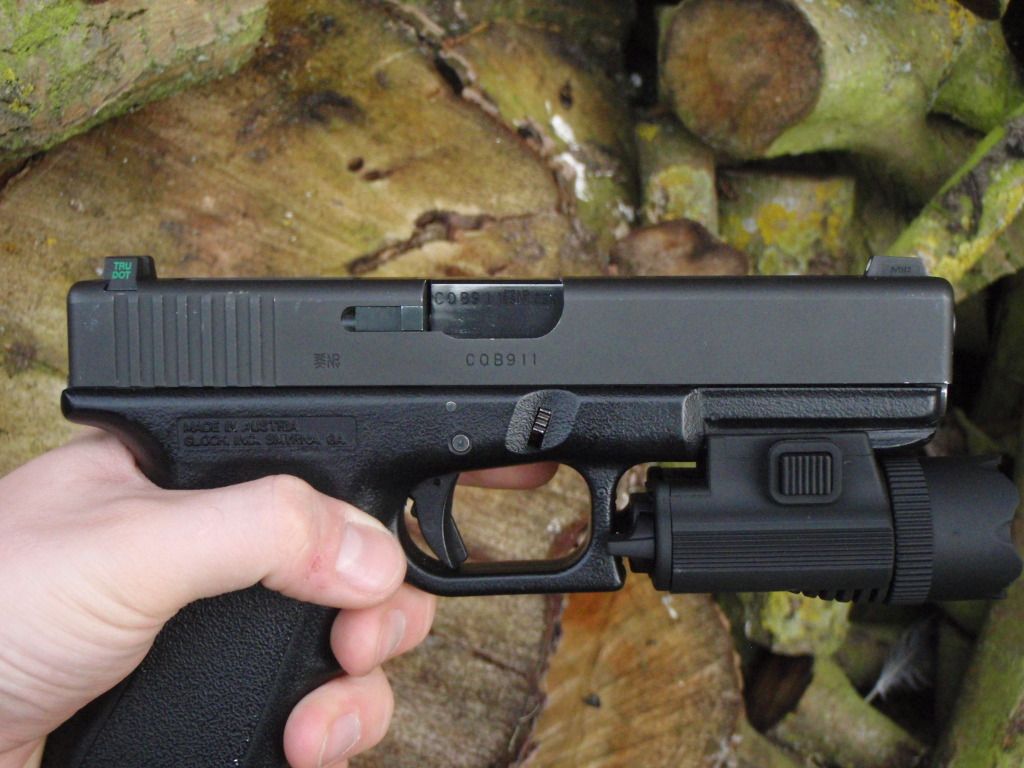 |
| The sights in profile |
Finally, the slide (when locked back) can be very easily released by raking the rear sight downwards over clothing, or by pulling back on the front of the rear sight due to its square profile, increasing the flexibility of your preferred drills.
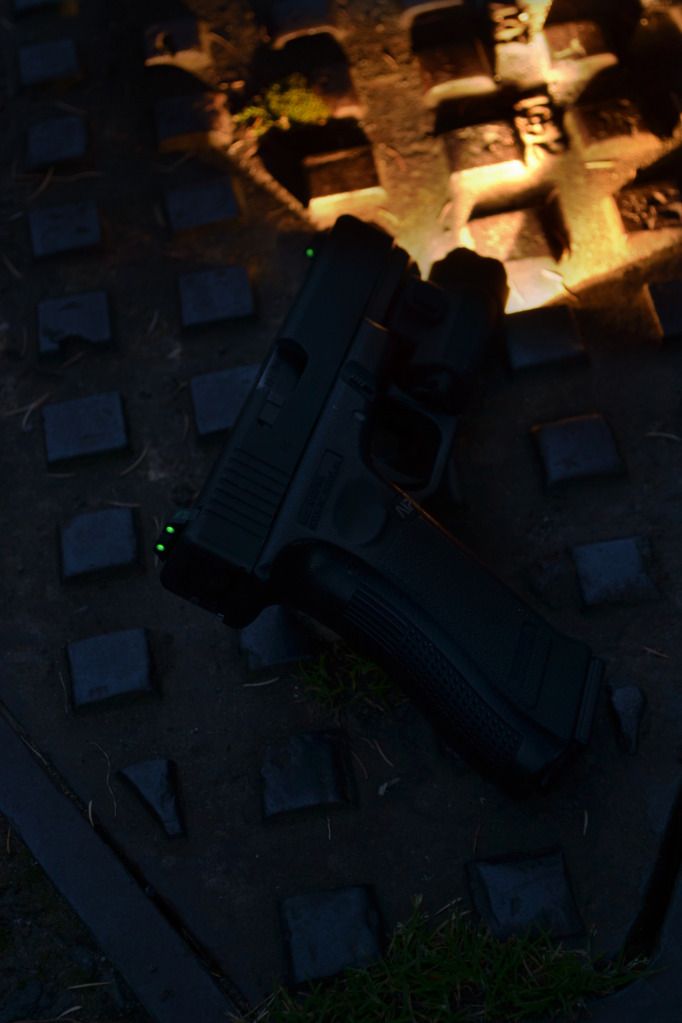
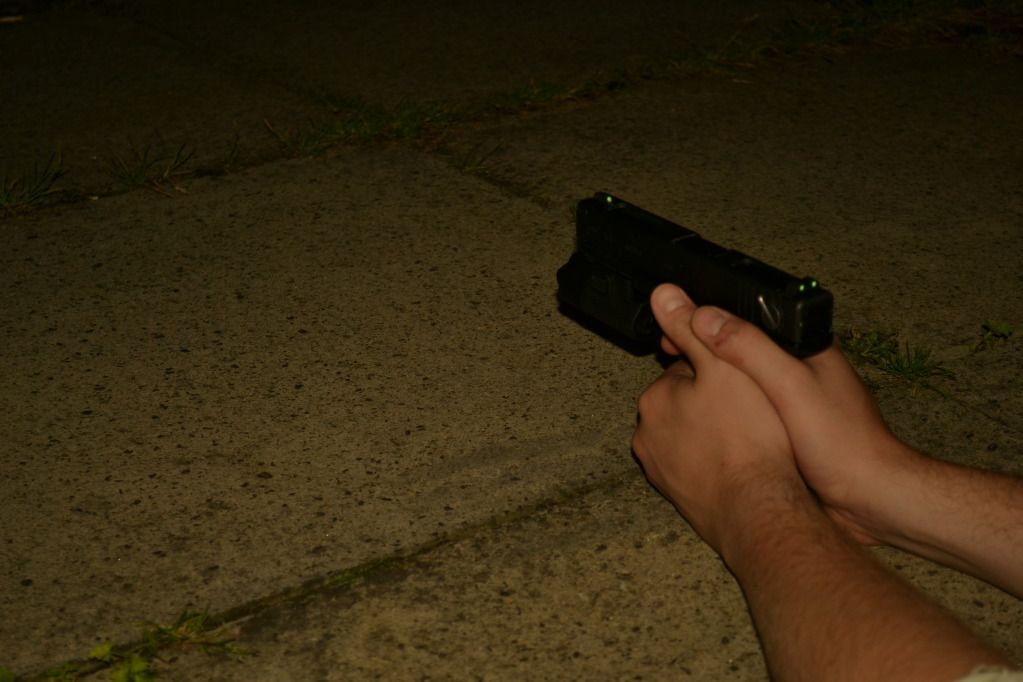
Night Time Performance
As said before, the night time performance of the sights is very satisfying, but since writing the review last time I did some night photography which should give an idea of what these sights look like.
 |
| Indoors, low light, 30s exposure |
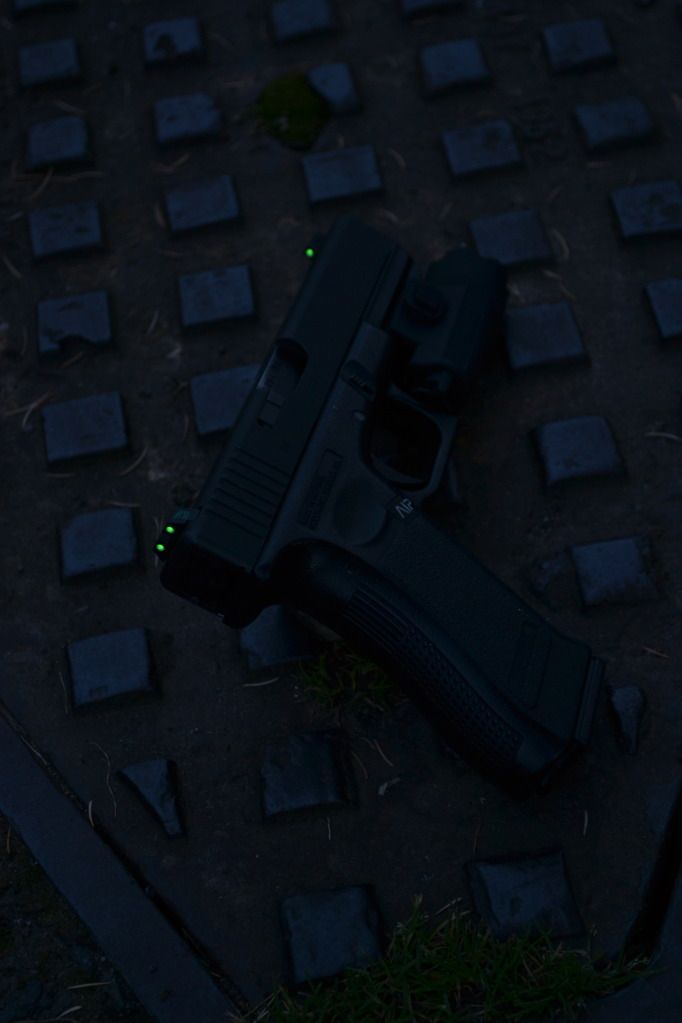 |
| Outside, night time, 1min exposure |
 |
| Night time, torch on, 2s exposure |
 |
| Digital manipulation of the previous pics. |
 |
| Night time, with flash & 20s exposure |
Summary
Whilst not the cheapest things in the world, I'd recommend these to anyone who has a Glock and fancies playing a few night games (the main reason I got mine) - however they are fantastically functional in daylight (and will suit transitioning from outdoors to dim interiors perfectly), so I'd also recommend them to anyone who wants a different sight picture/look for their glock. They are a breeze to install if you have something to shim the rear sight with, and they are very rigidly held in place.
For fitting to an airsoft KSC Glock I would personally rate them a 9/10, with performance/build being excellent. The only slight let down is the fit of the rear sight, which will require some shimming with an appropriate material.
For fitting to an airsoft KSC Glock I would personally rate them a 9/10, with performance/build being excellent. The only slight let down is the fit of the rear sight, which will require some shimming with an appropriate material.
Dave out.
Subscribe to:
Posts (Atom)